
In this Web3 tutorial, we’ll be building a fully-functional blockchain, web3 App. We’ll be starting with the basics of building a blockchain app and at the end, we’ll get our web3 app live for everyone to use.
What Are We Going to Build?
We’ll be building a Decentralized App(dApp) called 🧀 Pick Up Lines. As the name suggests, our users will be able to send some good ol’ pickup lines and stand a chance to win Ethereum as a reward.
Prerequisites
- Beginner to intermediate knowledge of React
- Some familiarity with Solidity smart contracts
- Basic understanding of blockchain programming
Work becomes play with the right tools, right? Fortunately, web3 has a plethora of tools at its disposal to achieve the infamous WAGMI 🧘
- Visual Studio Code or any text editor
- Hardhat for Ethereum development
- Metamask as a crypto wallet
- Vercel and Alchemy as hosting platforms
Let’s Begin!
Now, that we have some idea of the final app and the tools that we’re going to use, let’s start writing code!
First, we’ll write the smart contract of our blockchain app. Then, we’ll build our React app, and at the end, connect those two things to have a full-fledged web3 app.

Writing our Smart Contract in Solidity:
1. Get our Local Ethereum Network Running
We need to spin up a local Ethereum network. A local Ethereum network is a blockchain network that specifically runs on your local machine. We’ll use it for testing while we build our application, as it gives us all the blockchain features without using real cryptocurrency.
In this web3 tutorial, we’ll be using Hardhat. Since we need to test our blockchain app locally before launching, we’ll use fake ETH and fake test accounts to test our smart contract through Hardhat. Most importantly, it will facilitate compiling our smart contract on our local blockchain.
Now, head to the terminal and move to the directory you want. Once there, run these commands:
mkdir pickup-lines cd pickup-lines npm init -y npm install --save-dev hardhat Next, let’s get a sample project running:
npx hardhat Run the project:
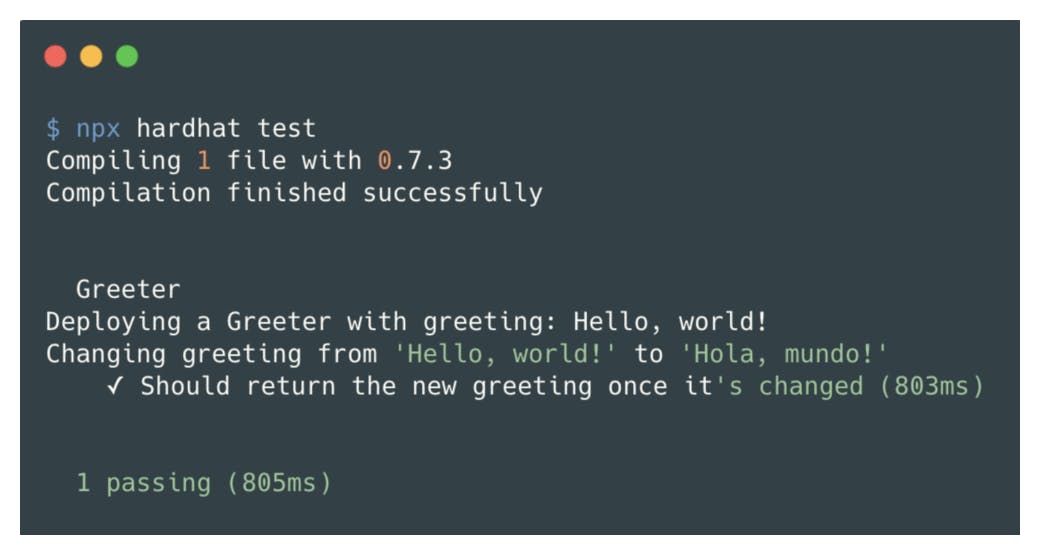
npx hardhat compile Test the project:
npx hardhat test The code above sets up a barebone Hardhat project. With no plugins, it allows you to create your own tasks, compile your Solidity code, and run your tests. Basically, you’re creating a blockchain network in a local environment
You’ll see something similar to this:
2. Creating our Smart Contract
Now, let’s create a PickupLines.sol file under the Contracts directory.
We need to follow a strict folder structure. It’s super important because we’re building on top of Hardhat, and the default paths for our
/contracts,/scriptsand/testare pre-defined. Not following this structure will lead to our Hardhat tasks failing. Be careful!
pragma solidity ^0.8.0; import "hardhat/console.sol"; contract PickupLines { constructor() { console.log("I am the Cheesy PickUp Lines' smart contract."); } } 3. Running Our Contract Locally
Now, let’s create a script to run the smart contract we just built. This will enable us to test it on our local blockchain.
Go into the scripts folder and create a file named run.js. In the run.js file, enter the following code:
const main = async () = { const contracts = await hre.ethers.getContractFactory("PickupLines"); const contract = await contracts.deploy(); await contract.deployed(); console.log("Contract deployed to:", contract.address); }; const runMain = async () = { try { await main(); process.exit(0); } catch (error) { console.log(error); process.exit(1); } }; runMain(); Let’s run the run.jsfile we just created from our terminal:
npx hardhat run scripts/run.js Did that go well? You can see the console.log message we put in our constructor() method. There, you’ll also see the contract address too

4. Finishing the Smart Contract Logic
Now, let’s make our contract a bit fancier.
We want to be able to let someone send us a pickup line and then…
Read More: web3.hashnode.com


 Bitcoin
  Ethereum
  Tether
  BNB
BNB  Solana
  USDC
USDC  XRP
XRP  Toncoin
  Dogecoin
  Cardano
  Shiba Inu
  Avalanche
  Wrapped Bitcoin
  Polkadot
  Bitcoin Cash
  NEAR Protocol
  Polygon
  Litecoin
  Fetch.ai
  LEO Token
  Uniswap
  Render
  Hedera
  First Digital USD
  Pepe
Pepe  Aptos
Aptos  Cosmos Hub
  Immutable
  Wrapped eETH
  Filecoin
  Stellar
  dogwifhat
  OKB
OKB  Arweave
  The Graph
  Arbitrum
  Optimism
  Bittensor