[ad_1]
Testing dapps on Mumbai, Polygon’s testnet, is imperative before launching on the mainnet. During the testing phase, developers should also execute test transactions with the help of a Polygon Mumbai faucet to ensure their projects work as intended. If you want to build on the Polygon testnet and use a Mumbai faucet, you must complete the following five steps:
- In your script, change the default chain from “ETHEREUM” to “MUMBAI“:
Moralis.start({ apiKey: 'YOUR_API_KEY', defaultEvmApiChain: EvmChain.MUMBAI }) - Grab your Web3 API key from your Moralis admin area and replace “YOUR_API_KEY” with it:
- Create your free Moralis account.
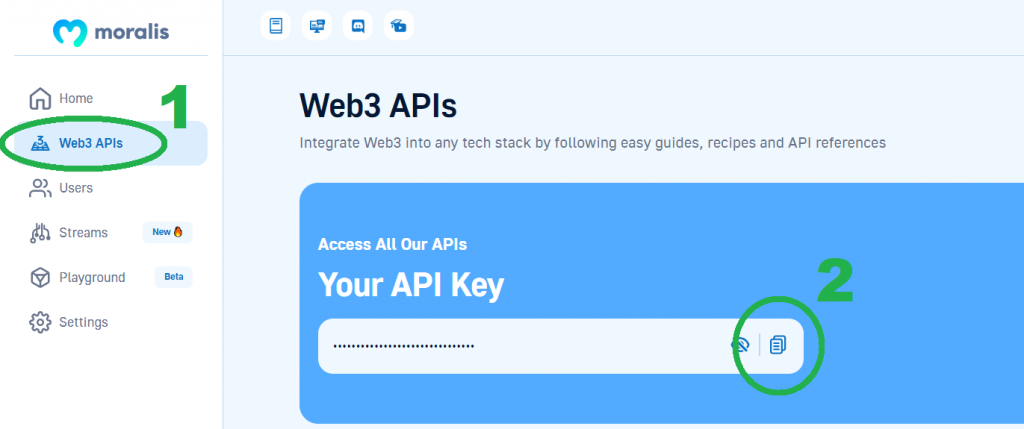
- Open the “Web3 APIs” page and copy your API key:
- Build your dapp by adding Web3 authentication, fetching on-chain data, and listening to wallets and smart contract addresses.
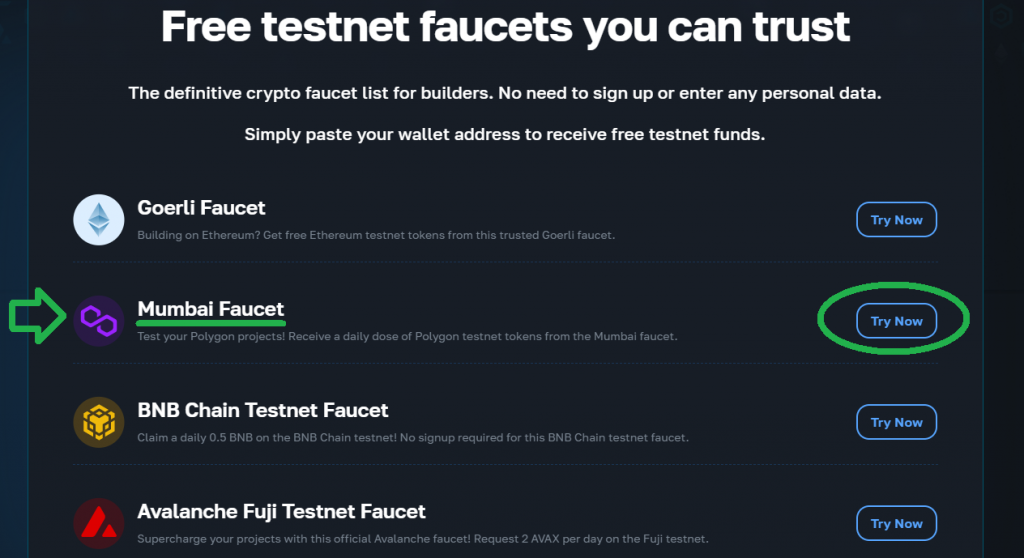
- Then, test your dapp using “test” MATIC, which you can obtain from the best Mumbai faucet. To access that faucet, visit Moralis’ testnet faucets list page and hit the “Try Now” button:

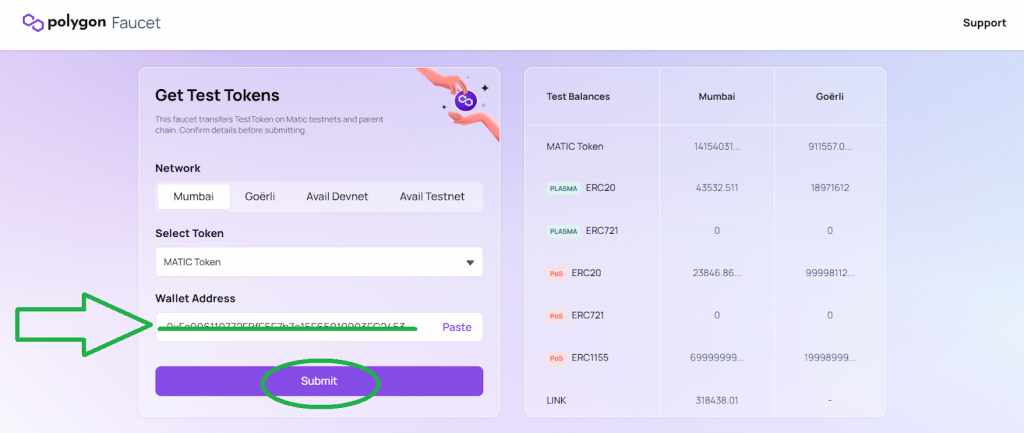
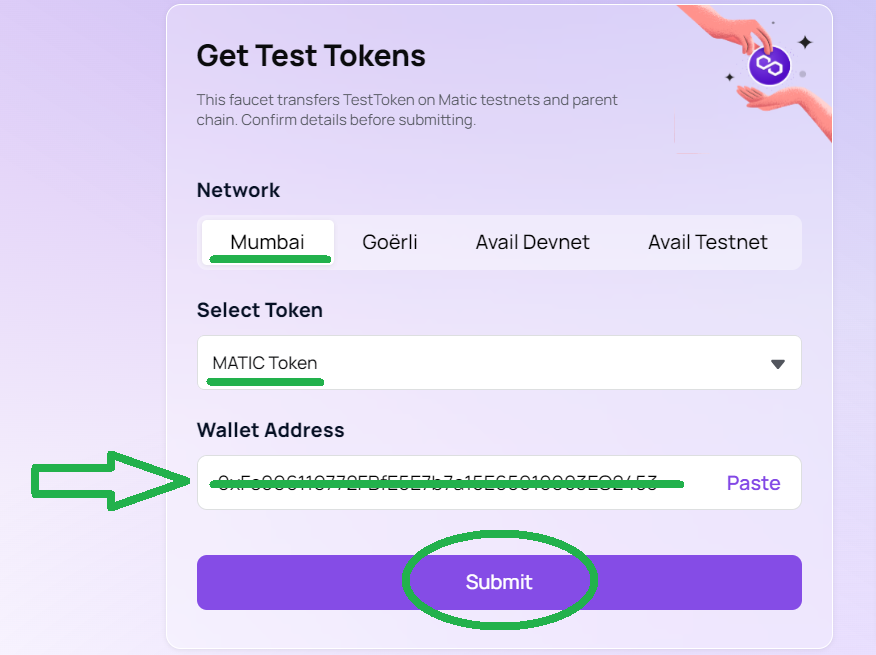
- Finally, paste in your wallet address and get some Mumbai MATIC to power your test transactions:
Create your free Moralis account and start BUIDLing dapps on the Mumbai network today! Then, you’ll be able to test them with the help of the best Polygon Mumbai faucet.

Overview
When it comes to Polygon, a reliable Mumbai faucet is your ticket to executing on-chain transactions on the Polygon testnet. Although Polygon’s layer-2 (L2) blockchain offers lower gas fees, you still want to test your projects (dapps and smart contracts) on the testnet before the mainnet launch to ensure everything runs smoothly.
Moving forward, we’ll first focus on showing you how to use the Web3 market’s leading Mumbai faucet. This is where we’ll explore the above-presented five steps in more detail. By doing so, you’ll be ready to roll up your sleeves and start creating and testing your killer dapps on the Mumbai network. However, for those who want to dive deeper into Polygon, its testnet, MATIC, and the Mumbai faucet, we have additional sections lined up just for you. Essentially, we’ll answer the “what is the Mumbai testnet?”, “what is test MATIC?”, and “what is a Polygon Mumbai faucet?” questions.
A reliable faucet, your MetaMask wallet, and Moralis are all you need to join the Web3 revolution. Thanks to Moralis’ cross-chain interoperability, you can target Polygon, Ethereum, BNB Chain, and many other leading blockchains, including their testnets. Furthermore, with Moralis’ Web3 Auth API, Web3 Data API, and Streams API, you can create dapps the easy way, and you don’t need to reinvent the wheel. As such, you’ll have the time and resources to create something unique on the frontend. Additionally, when you want to launch a dapp on Mumbai or Polygon quickly, the ultimate Polygon boilerplate is all you need. What’s more, you can experience the power of Moralis and access all of the above tools with a free Moralis account!
How to Use a Mumbai Faucet
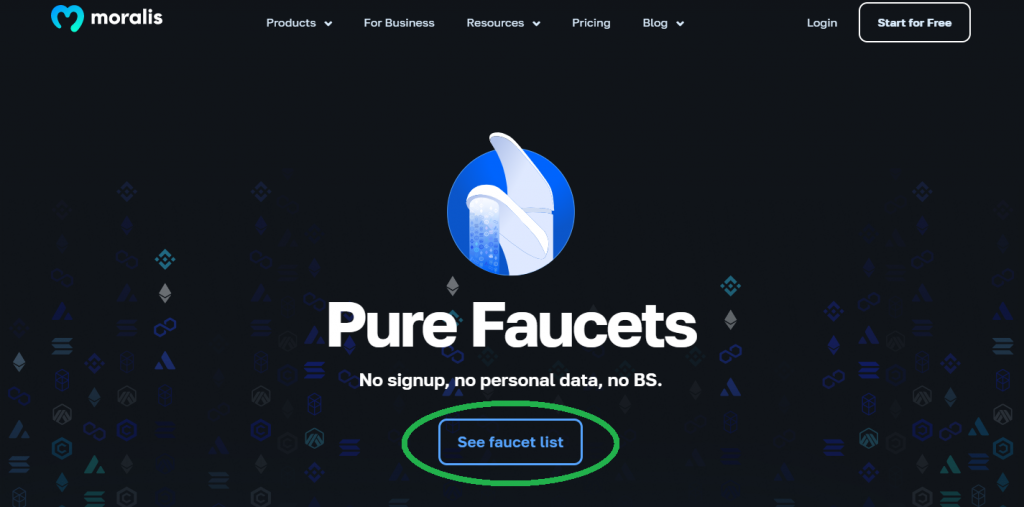
While various Polygon Mumbai faucets are available, we recommend sticking to the best one. The latter awaits you on our testnet faucets list. Once on that page, you’ll be able to access a list of reliable and user-friendly faucets by clicking on the “See faucet list” button:
This is also where you can find the best BNB faucet and the most reliable alternative among the Avalanche faucets. However, to build on the Polygon testnet, you want to click on the “Try Now” button next to “Mumbai Faucet”:
After clicking on the above button, you’ll land on the Polygon faucet page (see the image below). The Mumbai network and the “MATIC Token” alternative should be selected by default. As such, you just need to paste in your wallet address and hit the submit button:
You can copy your wallet address from your MetaMask extension with a single click:
Nonetheless, to see “test” MATIC in your MetaMask, you must add that network and switch to it. So, let’s show you how to do that as well.
How to Add Polygon and Mumbai to MetaMask?
When it comes to adding the Polygon Mumbai testnet and the Polygon mainnet to MetaMask, you have two options. You can use PolygonScan to add the two networks automatically, or you can do it manually. We’ll show you both methods herein.
Since adding the Polygon networks with PolygonScan is simpler and quicker, we’ll start with that option. So, use your browser where you have your MetaMask extension installed and visit PolygonScan. To add the mainnet, simply scroll down to the footer of the page and hit the “Add Polygon Network” button. This will prompt your MetaMask to ask for your approval:
To add the Mumbai testnet, you must follow the same two-step process as presented above. However, you must first switch PolygonScan to “Polygon Testnet”:
Once you switch to the PolygonScan Mumbai option, you will see the “Add Mumbai Network” button in the footer:
Now, you may want to add the Polygon networks manually. In that case, open your MetaMask and hit the “Add network” button:
Next, click on “Add a network manually”:
Finally, you need to enter the following details to connect to Mumbai and Polygon:
- These are the details to add the Mumbai testnet:
- Network Name: Polygon Testnet
- New RPC URL: https://matic-mumbai.chainstacklabs.com
- Chain ID: 80001
- Symbol: MATIC
- Block Explorer URL: https://mumbai.polygonscan.com/
- These are the details to add the Polygon mainnet:
- Network Name: Polygon Mainnet
- New RPC URL: https://polygon-rpc.com/
- Chain ID: 137
- Symbol: MATIC
- Block Explorer URL: https://polygonscan.com/
Whether you decide to add the above two networks automatically or manually, you’ll be able to connect to either of them once finished:
- The Polygon testnet – Mumbai:
Viewing Test MATIC in Your Wallet
At this point, you should know how to use the best Polygon Mumbai faucet and how to add the Mumbai network to your MetaMask. As such, you can view your “test” MATIC tokens in your wallet a minute or two after clicking on the “Confirm” button in the Polygon Mumbai faucet:
Here’s our example where we submitted our request twice to receive a total of 0.2 MATIC:
So, now that you know how to use the Mumbai testnet faucet and access your test MATIC, you need to learn how to build dapps on that testnet. After all, without a dapp, there’s nothing for you to test.
Interacting with the Mumbai Testnet via Moralis
When using the power of Moralis to build dapps, you can target many blockchains. For EVM-compatible chains, such as Polygon, you simply need to replace the default option of “EvmChain.ETHEREUM” with “EvmChain.MUMBAI” or “EvmChain.POLYGON“. As the image below indicates, another way to target Polygon chains is by using their chain IDs.
If you plan to do some serious testing, it makes sense to set the testnet you’re focusing on as your default chain. This is the option we used in the first step of the five-step intro. Moreover, the following snippet of code does the trick when targeting Mumbai:
import Moralis from 'moralis'; import { EvmChain } from '@moralisweb3/common-evm-utils'; Moralis.start({ apiKey: 'YOUR_API_KEY', defaultEvmApiChain: EvmChain.MUMBAI }) The API reference pages are other neat tools that Moralis provides you with. To find these, visit the Moralis documentation. These pages enable you to test Moralis’ API endpoints, and since Moralis is cross-chain interoperable, you can select the chain you want to focus on. You do this by setting the “chain” parameter to the name or the chain ID in hexadecimal format. So, in the case of the Polygon testnet, you need to select “mumbai” or “0x13881“:
When utilizing Moralis’ Streams API to listen to smart contracts or wallets, you can create new streams via Moralis admin UI. In that case, you just need to toggle the “Polygon Mumbai” option in the third step of the “Stream Configuration” layout:
At this point, you’re all set to start building dapps on the Mumbai testnet. Once your dapps are ready for testing, you’ll know how to get all the test MATIC you need from the best Polygon Mumbai faucet!

Exploring Polygon, Its Testnet, MATIC, and the Mumbai Faucet
For those unfamiliar with Polygon, testnets, and faucets, some additional context will create a much clearer picture. Therefore, it’s time we answer some basic questions to help you make the most out of the above-given actional instructions. After going through the following sections, you will learn what Polygon, the Mumbai testnet, MATIC, and the Polygon Mumbai faucet entail.
What is Polygon?
Polygon, formerly Matic, is one of the most popular layer-2 blockchains that strives to solve the scalability and usability issues of the Ethereum blockchain. It does so without compromising on decentralization by leveraging the existing networks, their community, and their ecosystem. Due to Ethereum’s adoption and power, Polygon chose this blockchain network as the first platform to showcase Polygon’s scalability solutions.
In short, Polygon is a protocol and a framework for building and connecting Ethereum-compatible blockchain networks and dapps. However, unlike other L2 scaling solutions, Polygon is categorized as a sidechain solution. This means it has its own ecosystem and proof-of-stake (PoS) consensus mechanism.
Note: This article focuses on Polygon as a blockchain; however, Polygon is a lot more. It’s essentially a new technology. You can read more about it in the Polygon lightpaper available at “polygon.technology”.
What is the Mumbai Testnet?
The Mumbai testnet is Polygon’s testnet. Following the general testnet guideline, it is a replica of its mainnet. The Polygon testnet serves the core Polygon community for testing Polygon updates before launching them to the mainnet. However, other developers use this testnet to test dapps and smart contracts and to test public engagement. You can also use the Mumbai network to create fungible or non-fungible tokens (NFTs) before going live.
Even after launching your projects to the Polygon mainnet, you will still want to utilize Mumbai before any major updates or upgrades of your project. This means you can test all changes on Mumbai before making any real commitments to your main dapp.
If you’ve transferred any cryptocurrencies with your Web3 wallet, you know that all blockchain transactions require gas fees. Once you have dapps interacting with smart contracts’ “write” functions, they will require gas. The latter is covered in native currencies (e.g., ETH for Ethereum). So, you don’t want to spend actual money on testing, which you would if you were to test your dapps on mainnets. Despite the fact that Polygon has much lower gas fees than Ethereum, it’s still better to use “test” currency. Plus, it’s not technically sound to burden the mainnet for testing purposes. All in all, Mumbai and other testnets make Web3 development technically and economically viable and serve as a “sandbox” for devs.
MATIC – What is Test MATIC
We’ve mentioned above that blockchains use their native currencies to power transactions (gas). Polygon’s native token is MATIC. However, you don’t want to use MATIC for testing purposes. Fortunately, the Mumbai testnet has its own native token that is distinct and separate from the MATIC token on the Polygon mainnet. We call these tokens “test” MATIC or Mumbai MATIC.
Besides functioning as test coins, these tokens do not have any real value. This means you can experiment on the Polygon testnet without spending a dime. To get “test” MATIC, you need to use a Mumbai faucet.
Mumbai Faucet – What is a Polygon Mumbai Faucet?
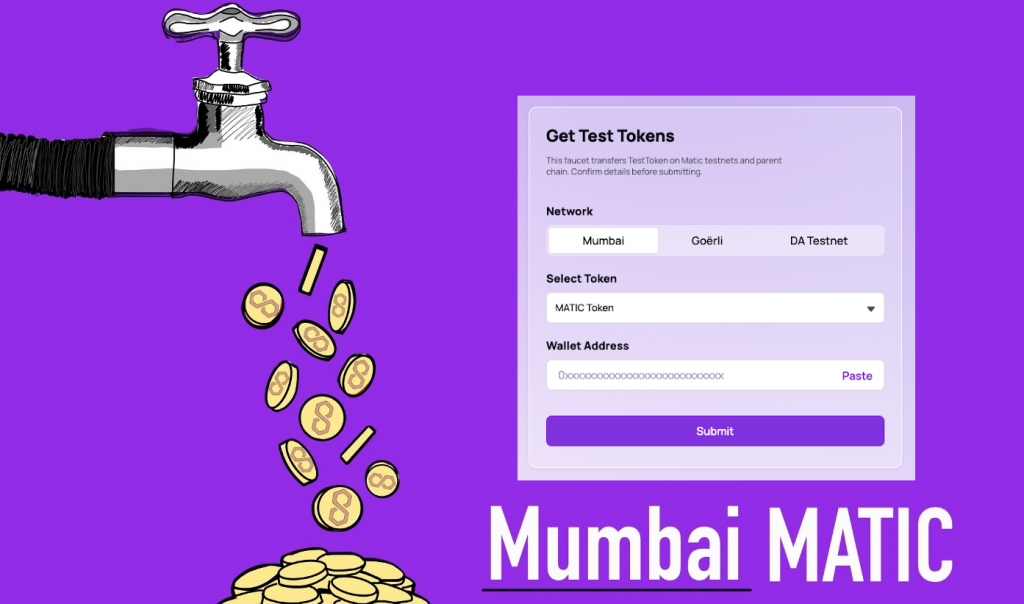
A Polygon Mumbai faucet is a web application that enables devs and testers to obtain “test” MATIC for free. As you saw in the “How to Use a Mumbai Faucet” section above, a good faucet is very simple to use. It requires users to input a wallet address and hit “Submit”. Then, devs have sufficient “test” MATIC to start executing transactions on the Mumbai network.
However, it’s worth pointing out that not all faucets are like that. Some are quite complicated and not user-friendly by any means. For example, some faucets demand users to take specific actions on social media platforms to get “test” tokens. As such, it’s important that you stick to quality, user-friendly faucets like those offered on Moralis’ Pure Faucet page. Aside from the best Mumbai faucet, this is also the place to find the best Ethereum faucet and other reputable faucets.
Mumbai Faucet – The Best Polygon Mumbai Faucet for Test MATIC – Summary
In today’s article, you learned how to use the best Mumbai faucet to get “test” MATIC for free. We also showed you how to add the Polygon testnet and the Polygon mainnet to MetaMask, both automatically and manually. You also learned how to easily interact with the Mumbai network using Moralis. As such, you now know how to start creating dapps with powerful tools and how to stack your Web3 wallet with test tokens to cover transactions on the Mumbai testnet.
With the knowledge obtained herein, you know enough to take your Web3 development game to the next level. You can tackle your own ideas or build up your confidence by taking on some excellent tutorials that await you in Moralis’ docs, the Moralis YouTube channel, and the Moralis blog. The latter is also the place to expand your blockchain development knowledge stack. For instance, you can explore a Sepolia testnet faucet, learn how to mint an NFT from a contract, and get answers to the “what is Web3 technology?“, “what is a Solana wallet?“, and “what is danksharding?” questions.
However, if you are eager to land your dream job in Web3, you should become blockchain-certified by enrolling in Moralis Academy. This online blockchain development academy offers countless courses that can help you become a blockchain expert in no time. Make sure to first get your blockchain and Bitcoin fundamentals right.
[ad_2]
Read More: moralis.io



 Bitcoin
  Ethereum
  Tether
  XRP
XRP  Solana
  USDC
USDC  TRON
TRON  Dogecoin
  Lido Staked Ether
  Cardano
  Wrapped Bitcoin
  Hyperliquid
  Wrapped stETH
  Bitcoin Cash
  Sui
Sui  LEO Token
  Chainlink
  Stellar
  USDS
USDS  Avalanche
  WhiteBIT Coin
  Toncoin
  Shiba Inu
  Binance Bridged USDT (BNB Smart Chain)
  Litecoin
  WETH
WETH  Wrapped eETH
  Hedera
  Ethena USDe
  Monero
  Polkadot
  Bitget Token
  Coinbase Wrapped BTC
  Uniswap
  Pi Network
  Pepe
Pepe  Dai
Dai  Aave
Aave  OKB
OKB  Ethena Staked USDe
  BlackRock USD Institutional Digital Liquidity Fund
  Bittensor
  Aptos
Aptos  Cronos
  sUSDS
sUSDS  Internet Computer
  Jito Staked SOL
  NEAR Protocol
  Ethereum Classic