MetaMask’s handy mobile app and browser extension can help you move Ethereum-based tokens across Web3. That includes NFTs. It’s a little tricky to view your NFTs on MetaMask, but it can be done by following a few simple steps.
Here, we’ll cover how to view NFTs in the mobile app, and how to find them through the Portfolio tool in the browser view.
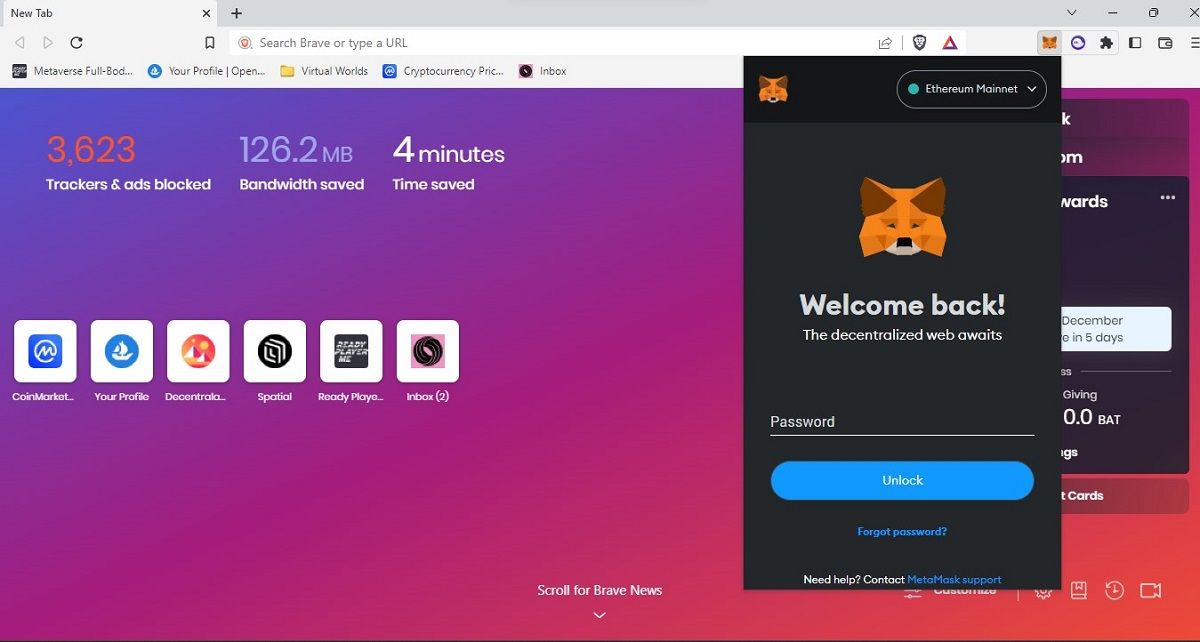
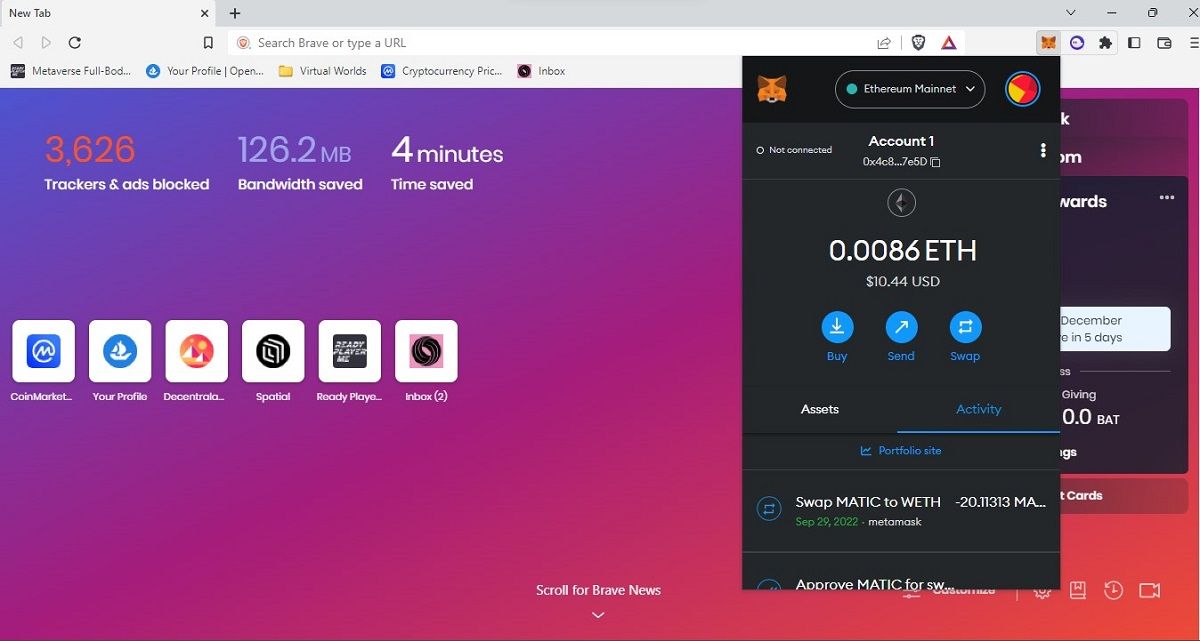
Viewing your NFTs through your MetaMask browser extension is faster and easier, but it’s also less reliable. First, sign in to your MetaMask account. If you haven’t done this in a while, click the MetaMask icon in your browser toolbar, enter your password and click the Unlock button.
Now you should see a readout of the tokens in your MetaMask account, options to buy, sell, or swap tokens, and options to view assets or activity. Below this is another menu item labeled Portfolio site. Click that button.
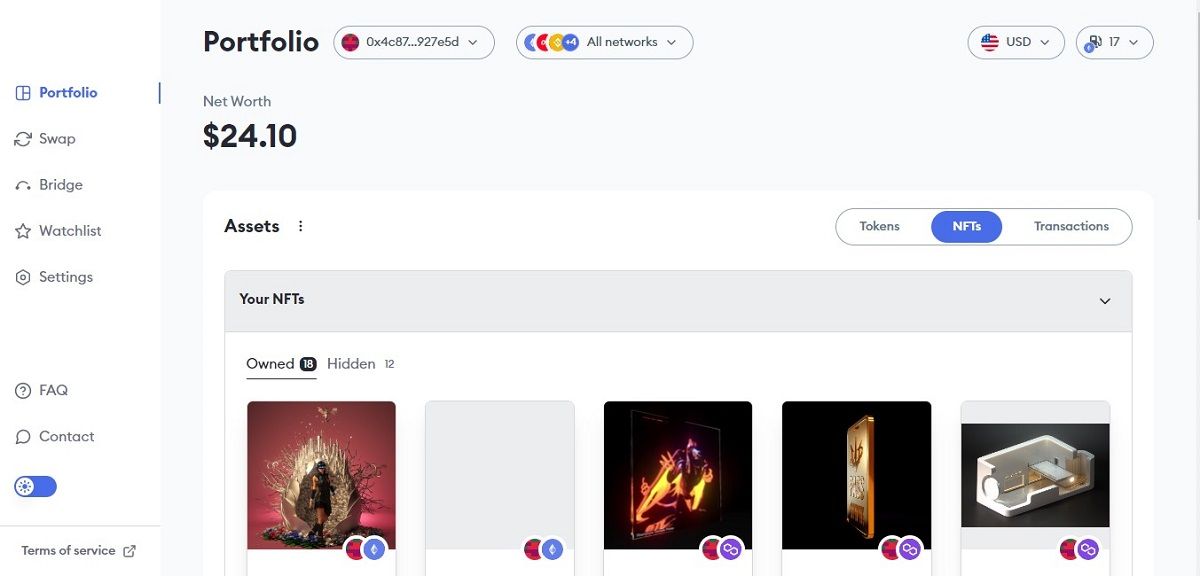
This takes you to a website that should look more like a crypto desktop wallet and less like a browser extension. It displays things like your net assets in the wallet and – yes – your glorious NFTs. Just toggle the button on the right from Tokens to NFTs. But, there’s a catch.
You may notice that some of the NFTs in your portfolio doesn’t look familiar. According to an email from MetaMask’s support team, sometimes spam NFTs find their way into the portfolio view. MetaMask support recommends hiding these unfamiliar NFTs and avoiding clicking any links associated with them.
Viewing your NFTs through the MetaMask mobile app is a trickier operation, but it’s more reliable. No unfamiliar NFTs here. However, the MetaMask app lacks a Portfolio site. There are two alternative ways to view your NFTs in the app.
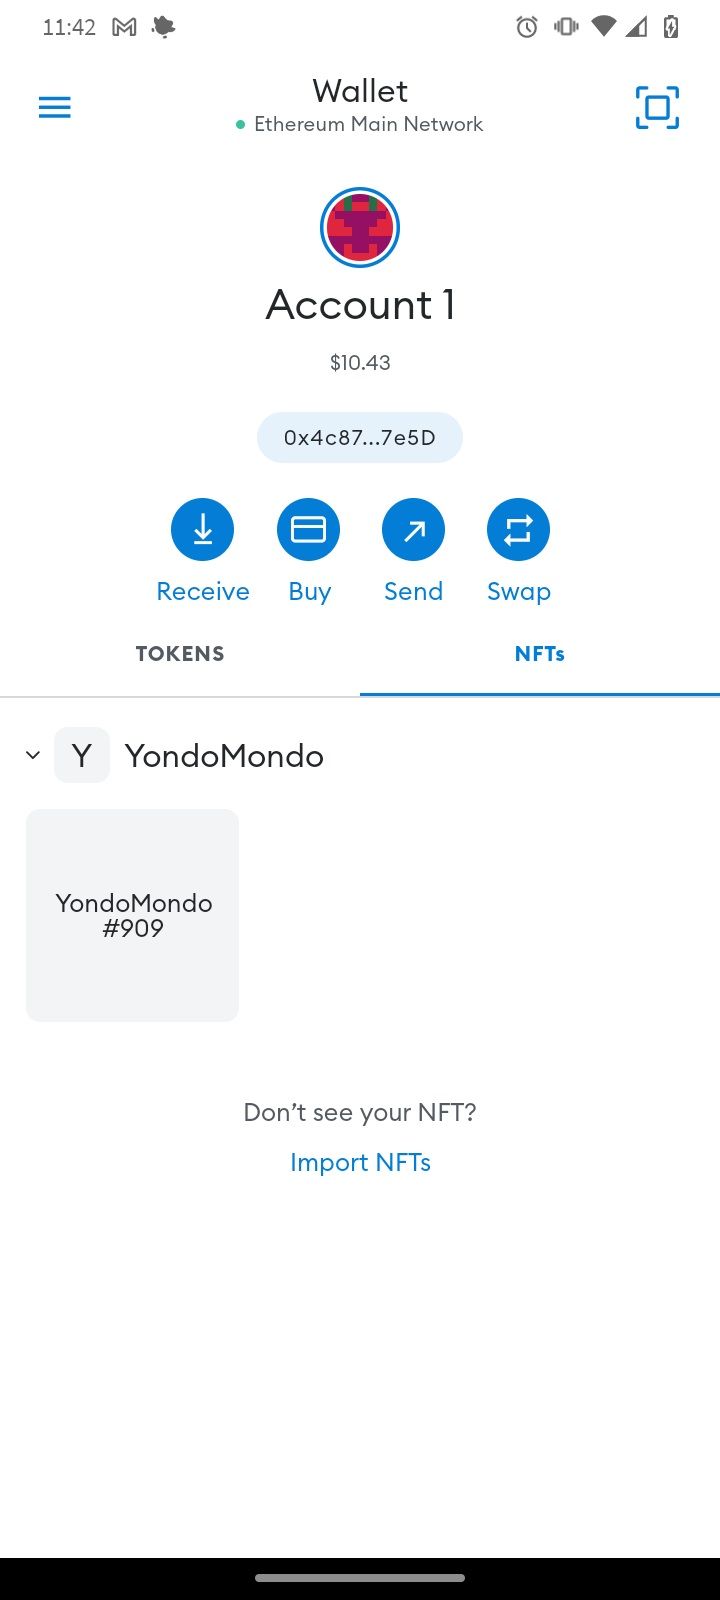
In either case, the first step is to sign into the MetaMask mobile app. The home screen should look similar to when you first log into the browser version. Under the options to receive, buy, send, and swap tokens, you can toggle the view from TOKENS to NFTs. The first time that you do this, you likely won’t see any NFTs. At the bottom of the screen, tap Import NFTs.
The MetaMask OpenSea and Third-Party APIs
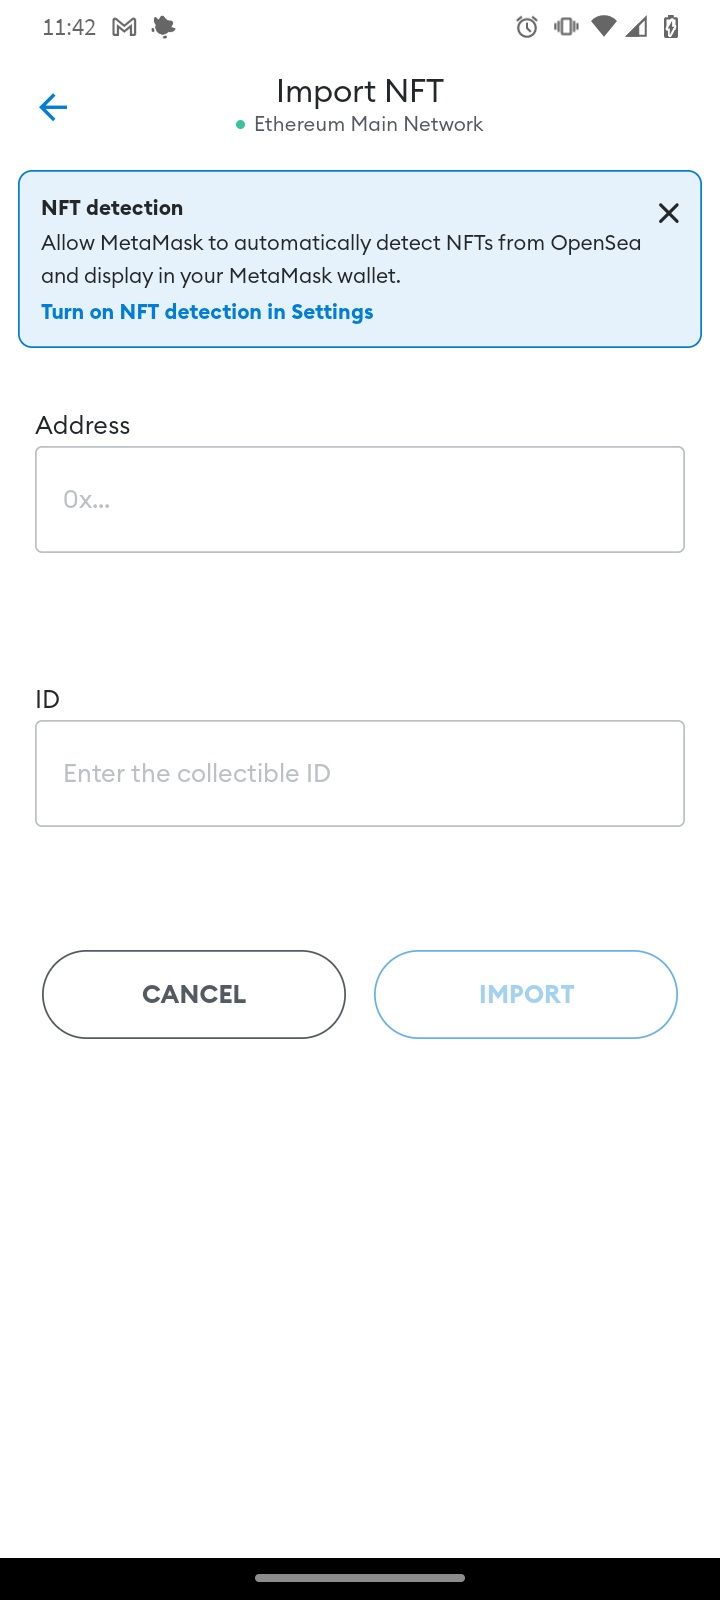
The top option on this page is a box labeled NFT detection. At the end of a short explainer, there’s a link that reads Turn on NFT detection in Settings. This link routes you to a settings page where you can tell MetaMask to automatically detect NFTs associated with the account and to link with OpenSea, the most popular NFT marketplace.
Both of these options sound fast and easy but, again, there’s a catch. According to MetaMask, these options can expose account information and your IP address. If you think it’s worth it, that’s your call, but there is another way.
Manually Importing NFTs
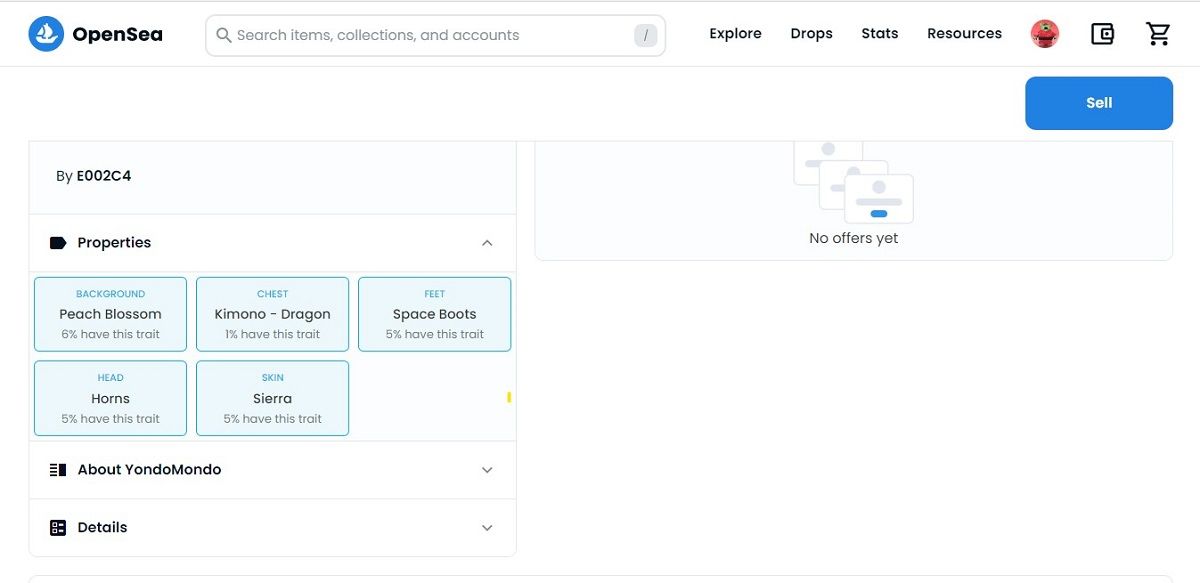
Back on the initial Import NFT screen, below the blue box, there are fields for an Address and an ID. This is so that you can manually enter information about your NFTs. You can find this information by clicking on the NFT in the portfolio site of the MetaMask browser view, or by selecting the NFT in the platform that you received it on and clicking Details.
The downside to this is that typing in the address for each NFT one by one is annoying – particularly if you have a lot of NFTs that you want to display. Where this method comes in handy is actually using your NFTs in other applications, for example, making it your profile picture on Twitter when you only need to import one NFT anyway.
Do What’s Right for You
Depending on how you use NFTs and MetaMask, you might choose any number of the options discussed above. Or, maybe you just like knowing that viewing NFTs on MetaMask is possible. The safest option isn’t always the easiest, but that’s the way of the world in NFTs and crypto.
Read More: news.google.com



 Bitcoin
  Ethereum
  Tether
  XRP
XRP  Solana
  USDC
USDC  Dogecoin
  Cardano
  TRON
TRON  Lido Staked Ether
  Wrapped Bitcoin
  Sui
Sui  Wrapped stETH
  Chainlink
  Avalanche
  Stellar
  Hyperliquid
  Shiba Inu
  Hedera
  LEO Token
  Bitcoin Cash
  Toncoin
  Litecoin
  Polkadot
  WETH
WETH  USDS
USDS  Monero
  Pi Network
  Wrapped eETH
  Bitget Token
  Pepe
Pepe  Binance Bridged USDT (BNB Smart Chain)
  Ethena USDe
  Coinbase Wrapped BTC
  WhiteBIT Coin
  Bittensor
  Uniswap
  Dai
Dai  NEAR Protocol
  Aave
Aave  Aptos
Aptos  OKB
OKB  Ondo
Ondo  Jito Staked SOL
  Internet Computer
  Ethereum Classic
  Cronos
  BlackRock USD Institutional Digital Liquidity Fund