Cryptocurrency is a new way of exchanging value, rewarding users, and paying for what you purchased. It’s often seen as the digital version of money on the internet.
According to Wikipedia: “A cryptocurrency is a tradable digital asset or digital form of money that is built on blockchain technology and only exists online.”
This tutorial will guide you on how to create and deploy your own cryptocurrency on the Rinkeby Testnet blockchain, which is transferable to other crypto wallet addresses.
Prerequisites
Before you continue with this tutorial, you should:
- Have Metamask installed.
- Have a basic knowledge of the Remix IDE.
- Have a basic understanding of Solidity smart contract, which you can find here.
What Are Some Reasons to Create Your Own Cryptocurrency?
- Testing purpose during dApp development.
- Rewarding your users.
- Membership coin.
- In-game currency.
-
Fun currency owned by you and your friends.
In this tutorial, we’ll create a fun cryptocurrency that we can share with our friends for either completing a task or winning a bet.
Step 1 – Writing the Smart Contract
The first step is to write a smart contract that will handle our cryptocurrency functionalities.
You can name your cryptocurrency whatever you want, but for this tutorial, we’ll name our cryptocurrency “UncleBigBay and Friends Token” with a symbol of “UBBFT”.
-
Launch the Remix IDE by clicking here:
-
In the
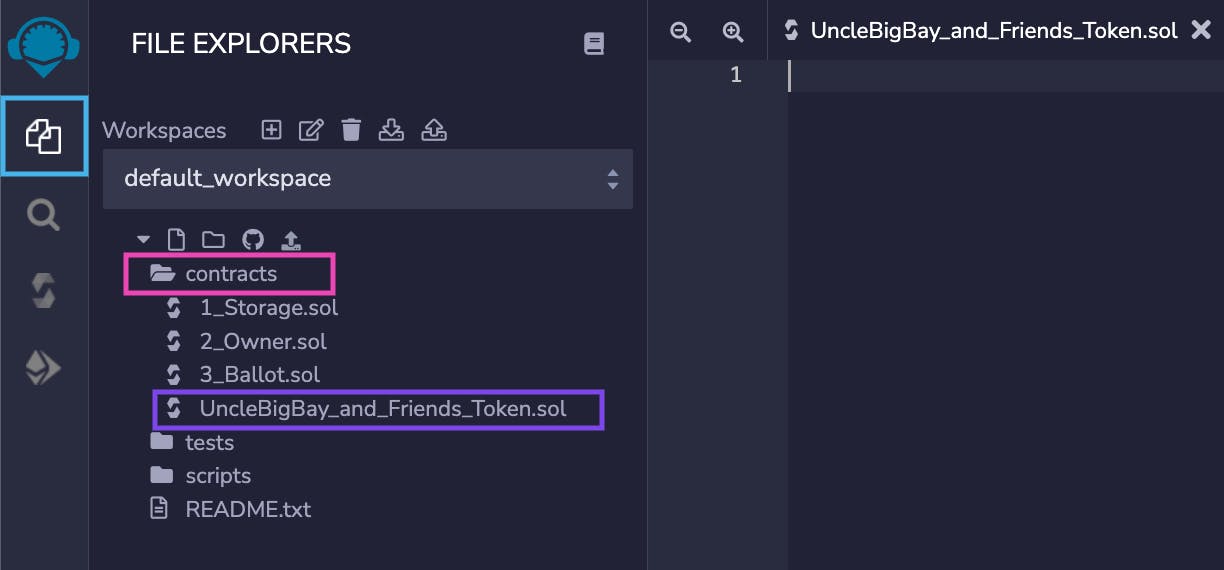
contractsfolder, create a new.solfile with the name of your currency, like this:UncleBigBay_and_Friends_Token.sol.
-
Copy and paste the following smart contract inside of your
.solfile:
pragma solidity ^0.8.13; contract UncleBigBay_and_Friends_Token { mapping (address = uint) public balances; mapping (address = mapping (address = uint)) public allowance; string public name = "UncleBigBay and Friends Token"; string public symbol = "UBBFT"; uint public decimals = 18; uint public tokensIActuallyWant = 9000000; uint public totalTokenSupply = tokensIActuallyWant * 10 ** decimals; constructor(){ balances[msg.sender] = totalTokenSupply; } function balanceOf(address owner) public view returns (uint){ return balances[owner]; } event Transfer(address indexed from, address indexed to, uint value); event Approval(address indexed owner, address indexed spender, uint value); function transfer(address to, uint value) public returns(bool){ require (balanceOf(msg.sender) = value, 'Your balance is too low'); balances[to] = balances[to] + value; balances[msg.sender] = balances[msg.sender] - value; emit Transfer(msg.sender, to, value); return true; } function transferFrom(address from, address to, uint value) public returns(bool){ require(balanceOf(from) = value, 'Your balance is too low'); require(allowance[from][msg.sender] = value, 'You can not spend up to this amount'); balances[to] += value; balances[from] -= value; emit Transfer(from, to, value); return true; } function approve(address spender, uint value) public returns(bool){ allowance[msg.sender][spender] = value; emit Approval(msg.sender, spender, value); return true; } } In our smart contract above,, we’re creating a total supply of 9 million UBBFT tokens with the following functions:
-
The
transfer()function enables our token holders to transfer from their wallets to other wallet addresses. -
The
transferFrom()function enables approval of token transactions, using the allowance mechanism, so that the spender doesn’t spend more than their token limits. It also allows our token holders to spend tokens on our behalf, for a gas fee or transaction confirmation on the blockchain. -
The…
Read More: web3.hashnode.com


 Bitcoin
  Ethereum
  Tether
  XRP
XRP  Solana
  USDC
USDC  Dogecoin
  Cardano
  Lido Staked Ether
  TRON
TRON  Wrapped Bitcoin
  Wrapped stETH
  Chainlink
  Litecoin
  Avalanche
  Stellar
  Sui
Sui  Toncoin
  LEO Token
  Shiba Inu
  Hedera
  USDS
USDS  Polkadot
  MANTRA
  Hyperliquid
  WETH
WETH  Ethena USDe
  Bitcoin Cash
  Bitget Token
  Wrapped eETH
  Uniswap
  Monero
  WhiteBIT Coin
  NEAR Protocol
  Aptos
Aptos  Pepe
Pepe  Dai
Dai  Internet Computer
  Aave
Aave  Ondo
Ondo  sUSDS
sUSDS  Ethereum Classic
  OKB
OKB  Bittensor
  Gate
Gate  Mantle
  Official Trump
  Coinbase Wrapped BTC
  Tokenize Xchange