In this tutorial, we’re going to learn how to build a basic Ethereum dApp with a frontend that interacts with a Solidity smart contract using the Ethers.js library.
This tutorial is a continuation of the Solidity Tutorial series. If you’re new to writing Solidity smart contracts, check out How to build your first Smart Contract before proceeding with this article.
Introduction
A smart contract is a function that’s deployed and executed on the blockchain only when a specific condition is met. There are a couple of ways in which we can interact with our deployed smart contract on the blockchain.
One way is by using the Ethers.js library to connect our dApp frontend to our smart contract, which serves as the backend.
In this article, we’re going to write and deploy a smart contract that accepts a pet’s name, its owner’s name, and its age. We’ll also retrieve the pet’s details from the smart contract using a getter function from our front-end project.
Demo
Here’s the demo video of the pet dApp we’re going to build at the end of this tutorial:
Prerequisites
Before you proceed with this tutorial, you should have:
- A basic understanding of HTML and CSS,
- An understanding of functions and the DOM in JavaScript,
- A basic understanding of Solidity, which you can find here.
Other technologies used in this tutorial include: Ethers.js library, Remix IDE, and Metamask.
Building the dApp
Our project is divided into two parts: the back end, in which we’ll write and deploy our Solidity smart contract on the Goerli Testnet; and the front end, where we’ll build our dApp interface with HTML and CSS, and interact with our deployed smart contract using JavaScript with Ethers.js.
Building the Back End
In this part, we’re going to write and deploy our Solidity smart contract on the Goerli Testnet using Remix IDE and Metamask.
Step 1 – Solidity IDE (Remix)
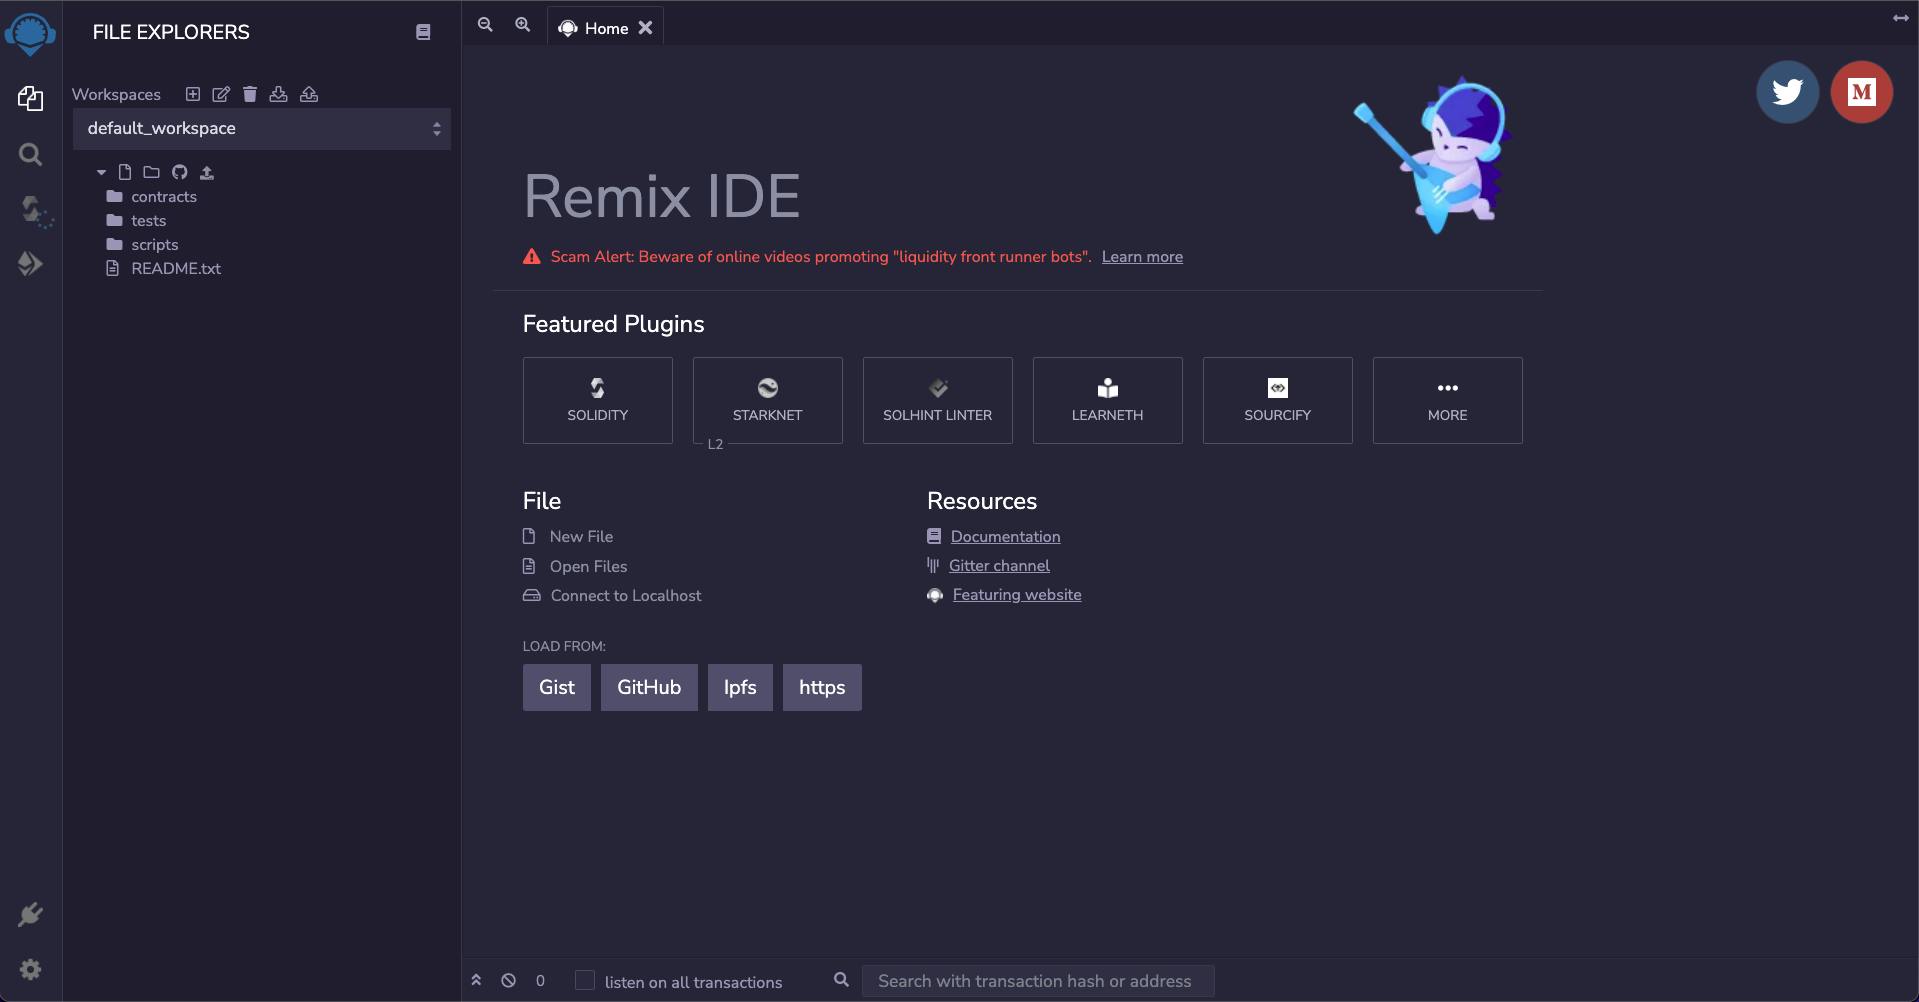
Remix IDE is a web-based Solidity compiler. It allows us to write, test, and deploy our Solidity smart contract directly from our browser without any configurations or setup.
We’re going to use the Remix IDE to write and deploy our pet smart contract.
Click here to launch Remix IDE on your browser:
Step 2 – Writing the Smart Contract
Locate the contracts folder under Remix’s “File Explorers” and create a new file called Pet_Contract.sol:
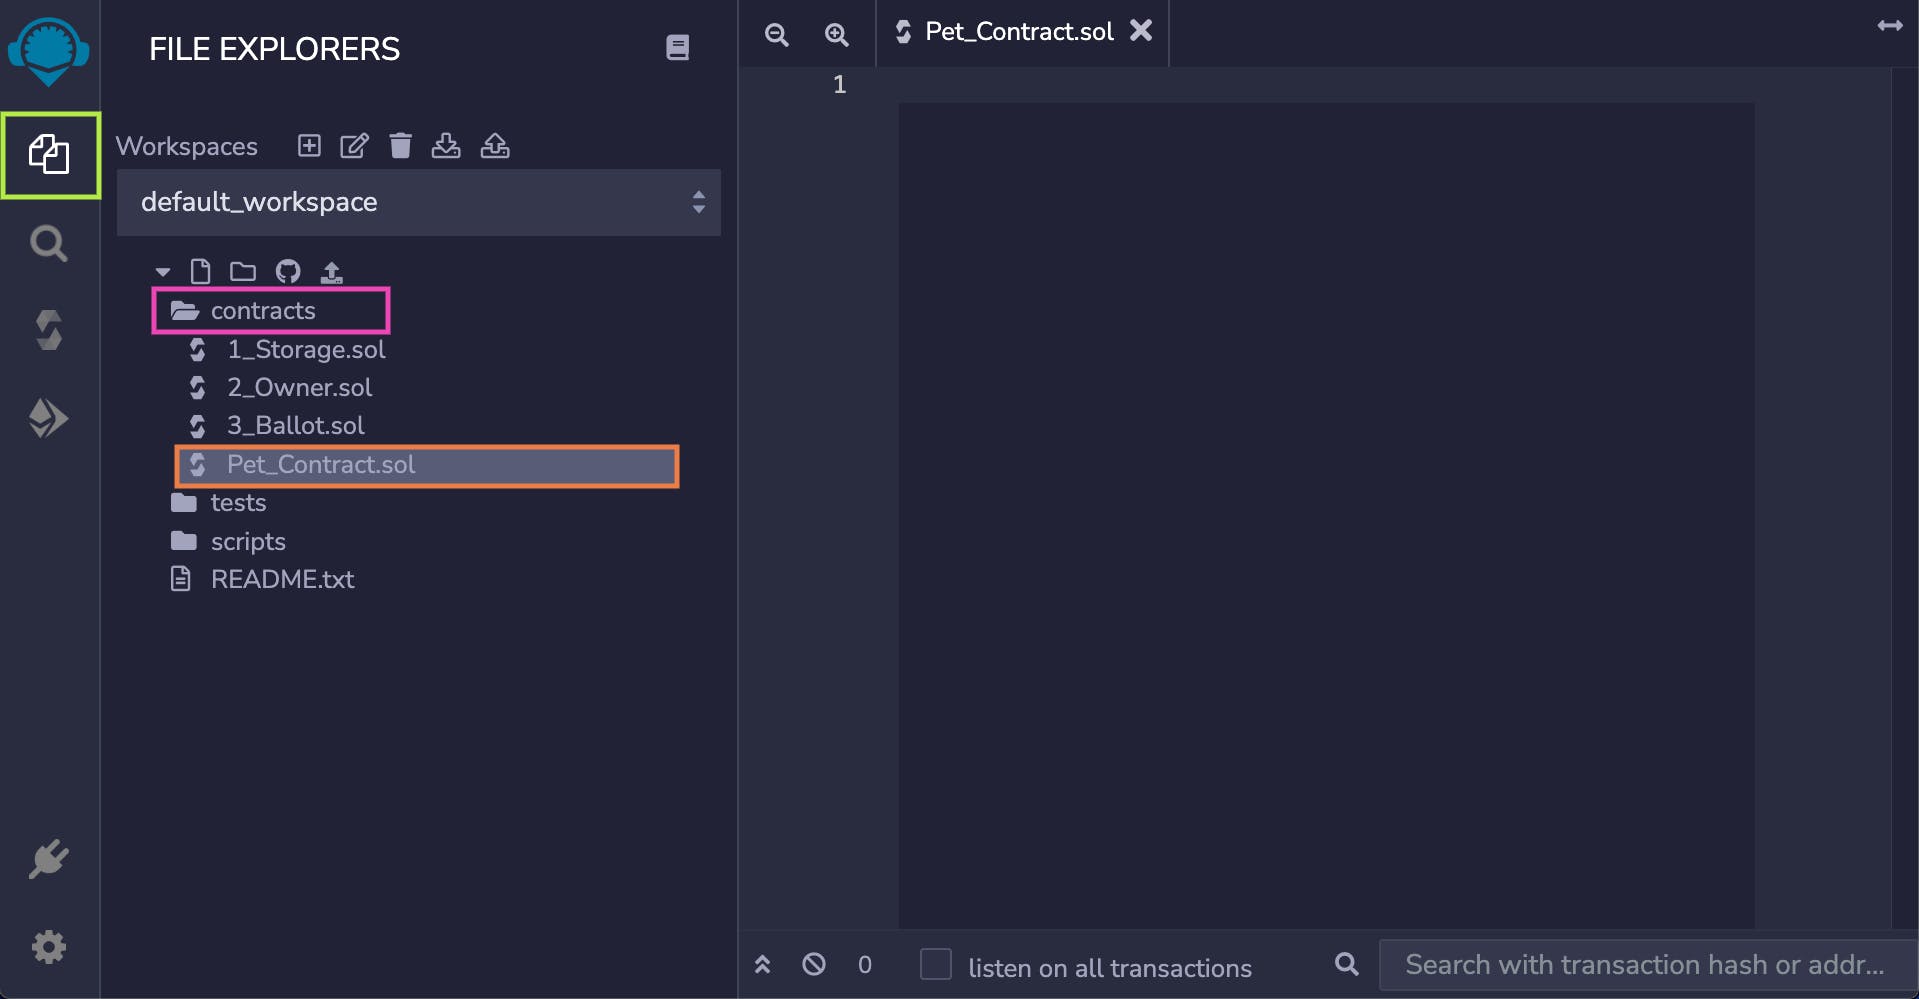
Copy and paste the Solidity smart contract below, inside the Pet_Contract.sol file:
pragma solidity ^ 0.8.13; contract Pet_Contract{ string public petName; string public petOwner; string public petAge; function setPet( string memory newPetName, string memory newPetOwner, string memory newPetAge ) public { petName = newPetName; petOwner = newPetOwner; petAge = newPetAge; } function getPet() public view returns ( string memory, string memory, string memory ){ return (petAge, petName, petOwner); } } The smart contract above is a modification of the first smart contract we wrote here. We’re creating a setPet function that takes in three parameters: petName, petOwner, and petAge, and stores them in memory when we invoke the setPet function.
The getPet function will return the current values of the petAge, petName, and petOwner states in our smart contract memory.
The complete breakdown explanations of the smart contract can be found here.
Step 3 – Compiling the Smart Contract
Follow the steps below to compile your Solidity smart contract on the Remix IDE:
-
Ensure to save your source file with
ctrl + s. -
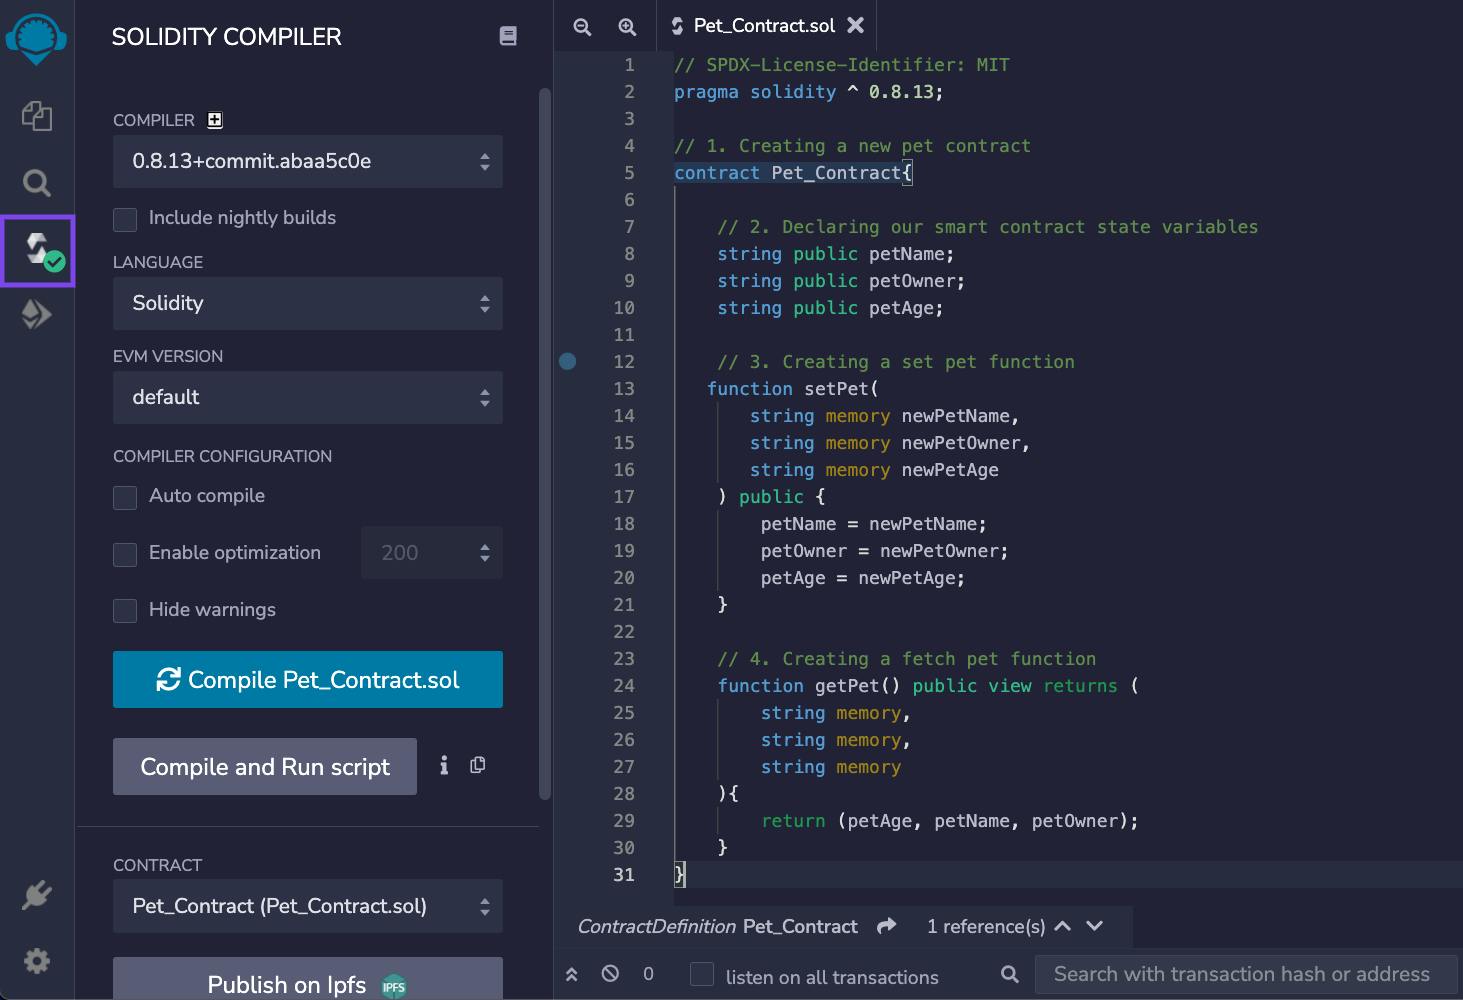
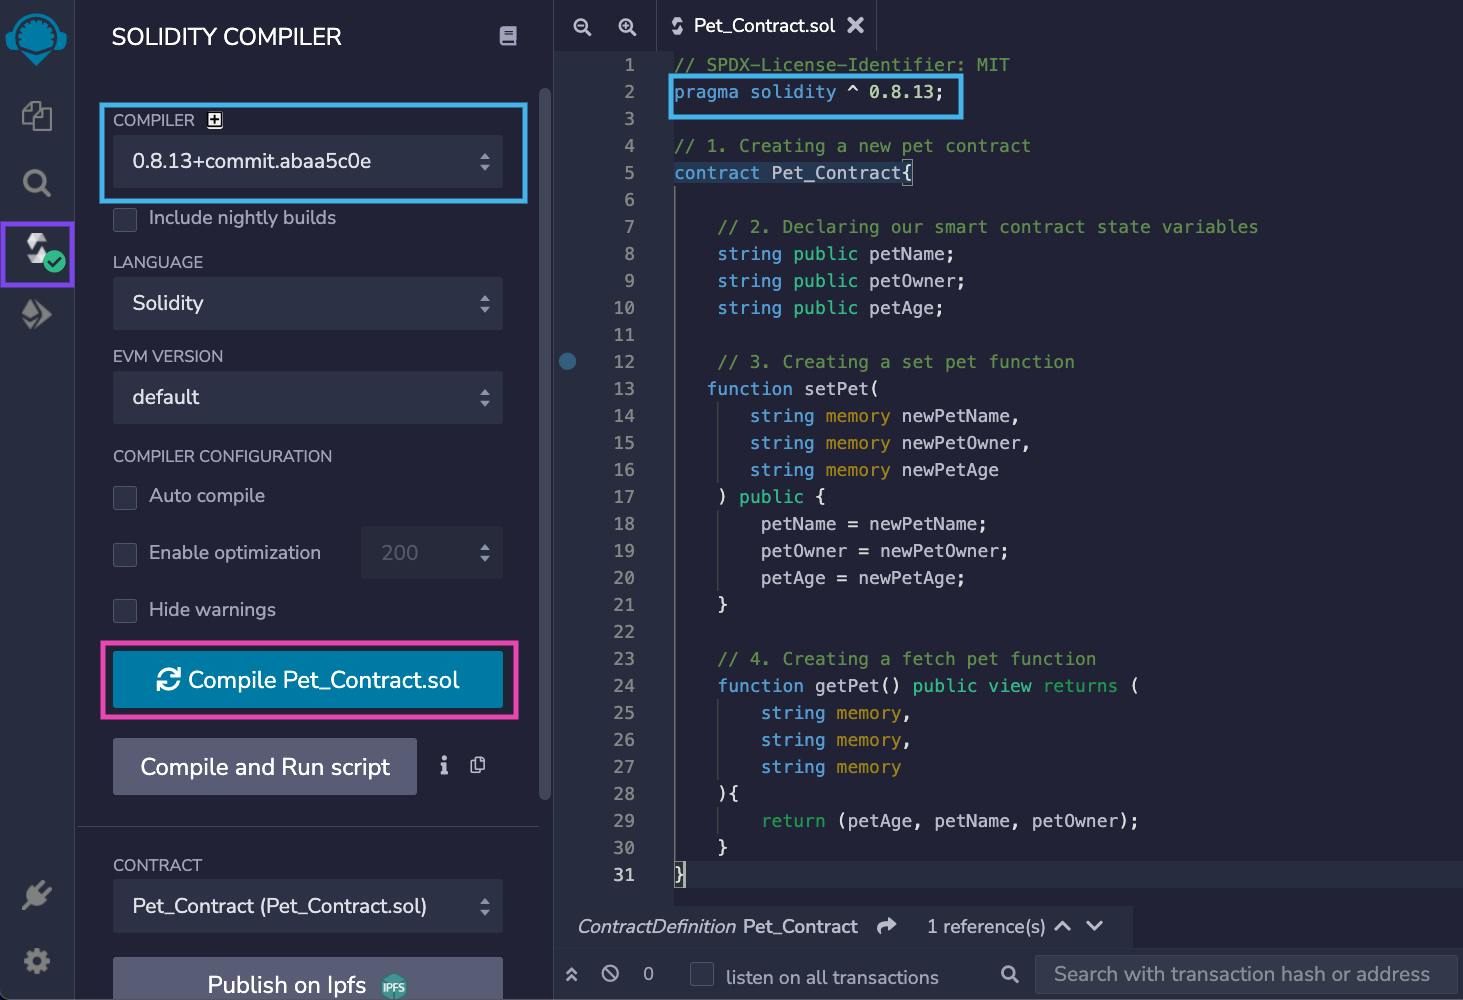
Then, navigate to the “Solidity Compiler” section:
-
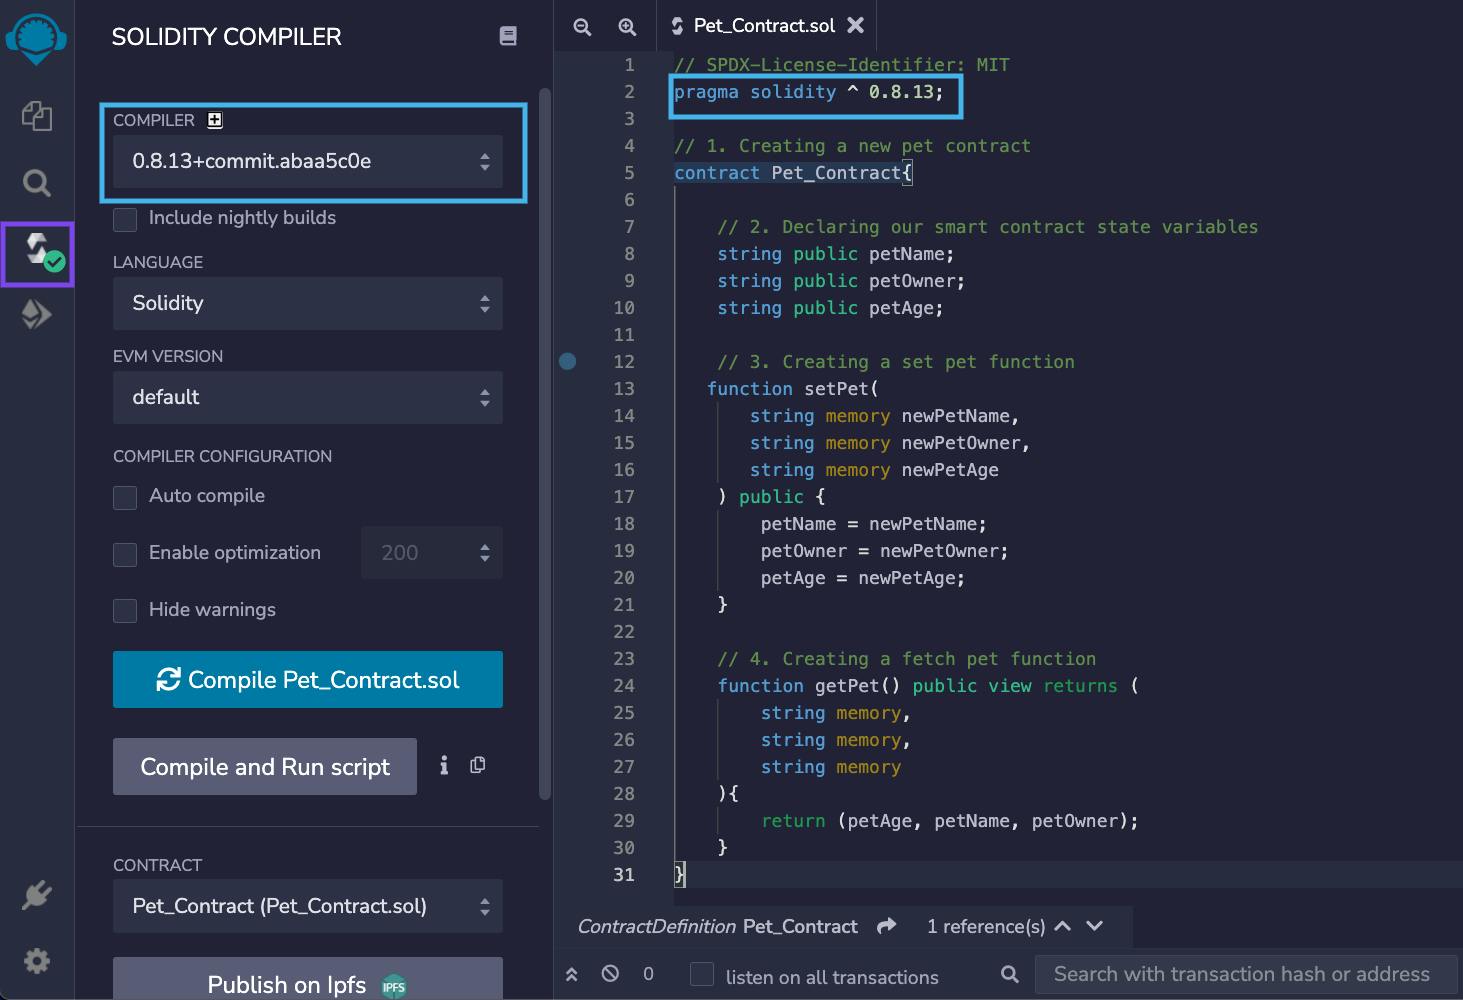
Select the compiler version that matches the one specified in our smart contract (if you don’t do this the green check will turn to red):
-
Next, ensure to save your file and click on the “Compile” button:
Step 4 – Getting Goerli Testnet Token
Now, we’re going to deploy our pet smart contract on the Goerli Test network, and we need some fake ETH to pay for the…
Read More: web3.hashnode.com




 XSGD
XSGD  zkRace
  Vertex
  Numbers Protocol
  GATSBY
  GOUT
GOUT  ShapeShift FOX
  BILLION•DOLLAR•CAT (Runes)
  Giko Cat
  OctaSpace
  XPR Network
  Clore.ai
  Kishu Inu
  GameFi.org
  Hoppy
Hoppy  XT.com
  BIM
BIM  Maya Protocol
  PAID
PAID  cUSDC
cUSDC  Sturdy
  Binance-Peg DAI
  Snowbank
  Shardus
  Everscale
  Boson Protocol
  UFO Token
  Rifampicin
  DexTools
  TROY
TROY  Step Finance
  Solv Protocol SolvBTC.CORE
  GoGoPool ggAVAX
  Ethervista
  A Hunters Dream
  Streamr
  Synternet
  Propchain
  FLOCK
FLOCK  Saros
Saros  AXOL
AXOL  district0x
  Tranchess
  cBAT
cBAT  CargoX
  Rich Quack
  Biswap