If you’ve been wondering how to develop blockchain applications, then follow along as this article teaches you how to create a full stack dapp (decentralized application/blockchain app) from scratch! Thanks to Moralis and its Web3 Data API, you can dive into blockchain app development using your JavaScript proficiency and cover backend features with short snippets of code. If you decide to tackle today’s task, we’re going to utilize the following code snippets:
- Fetching native balances:
const response = await Moralis.EvmApi.balance.getNativeBalance({ address: address, chain: chain, }); const response = await Moralis.EvmApi.token.getWalletTokenBalances({ address: address, chain: chain, }); - Obtaining cryptocurrency prices:
const nativePrice = await Moralis.EvmApi.token.getTokenPrice({ address: address chain: chain, }); - Querying NFTs in users’ wallets:
const response = await Moralis.EvmApi.nft.getWalletNFTs({ address: address, chain: chain, }); - Fetching token transfers:
const response = await Moralis.EvmApi.token.getWalletTokenTransfers({ address: address, chain: chain, }); Are you ready to begin your blockchain app development journey? If so, create your free Moralis account and follow our instructions!
Overview
The core of today’s article is our blockchain app development tutorial, allowing you to create your own Zapper clone. By either following along in the video above or taking on the step-by-step instructions in the upcoming “How to Develop Blockchain Applications” section, you will incorporate all of the above-showcased code snippets on the backend. Plus, you’ll create a neat frontend dapp that utilizes on-chain data to display wallet portfolios (native coins, tokens, and NFTs) and past transactions. Along the way, you will learn how to obtain your Moralis Web3 API key and how to initialize this ultimate Web3 API provider.
In the second part of today’s article, we’ll take on a more theoretical approach to exploring blockchain app development. Essentially, we’ll explore how to become a blockchain app developer. To start, we’ll see what this kind of development entails and how to get started with developing apps for blockchain. You’ll also find out which programming language is best for dapp development. Lastly, we’ll list some of the best blockchain app development courses for your Web3 journey.
How to Develop Blockchain Applications
You’re about to build your own “Zapper-like” blockchain app using JavaScript. To get to the finish line, you’ll need to complete the following five stages:
- Set up a NodeJS backend
- Set up a React frontend
- Get your Moralis Web3 API key
- Implement Moralis EVM API endpoints
- Add Web3 features and styling

Step 1: Set Up a NodeJS Backend
First, install NodeJS and the “npm” package. Then, create a new project folder, name it “zapper”, and open it in Visual Studio Code (VSC). Once in VSC, open a new VSC terminal and run the following command to create your “backend” directory:
mkdir backend
Next, “cd” into that folder:

Moving forward, initialize a new project with this command:
npm init
As the terminal prompts you with the initial options, simply hit enter a couple of times to stick to the default settings. Once you successfully initialize your new project, you’ll see a “package.json” file inside the “backend” folder:

Then, create an “index.js” file manually or use the command below:
touch index.js
Next, you need to install the required dependencies. The following command will do the trick:
npm i moralis express cors dotenv nodemon
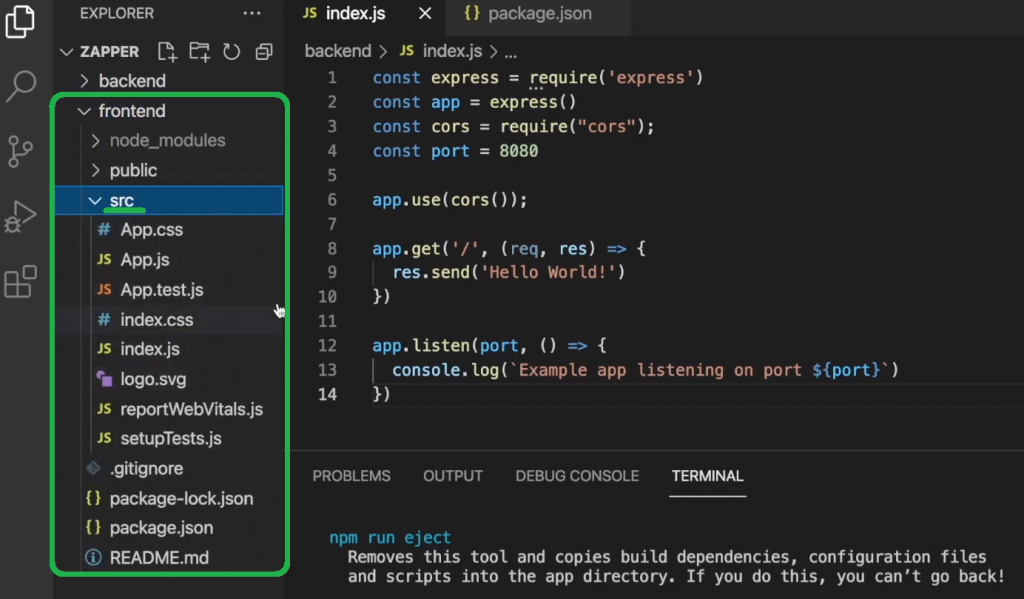
With the dependencies set in place, populate your “index.js” file with the following lines of code to create a simple “Hello World!” Express app:
const express = require("express"); const cors = require("cors"); const app = express(); const port = 8080; app.use(cors()); app.get(‘/’, (req, res) => { res.send(`Hello World!`); }); app.listen(port, () => { console.log(`Example app listening on port ${port}`); }); You also need to add the “start” script to your “package.json” file, where you include “nodemon index.js” to avoid manually relaunching your dapp after you make any changes to “index.js”:

To view your app’s functionality on localhost 8080, enter the following command in your terminal:
npm start
Then, you can use your favorite browser to see the “Hello World!” greetings:
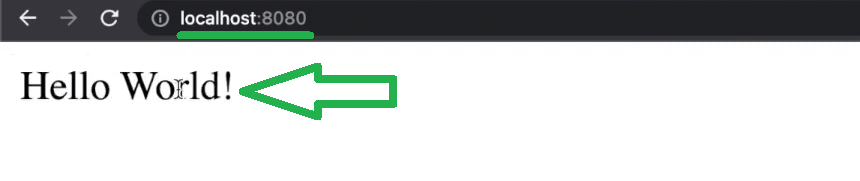
With your initial backend application up and running, it’s time we move on to the second stage of today’s tutorial on how to develop blockchain applications.
Note: Keep your backend running as you go about creating your frontend.

Step 2: Set Up a React Frontend
Create a new terminal instance:

Then, use your new terminal to create your React app with the following command:
npx create-react-app frontend
In response, you should get a new “frontend” folder that contains several template subfolders and files:
Next, “cd” into the “frontend” folder and start your template frontend application with this command:
npm start
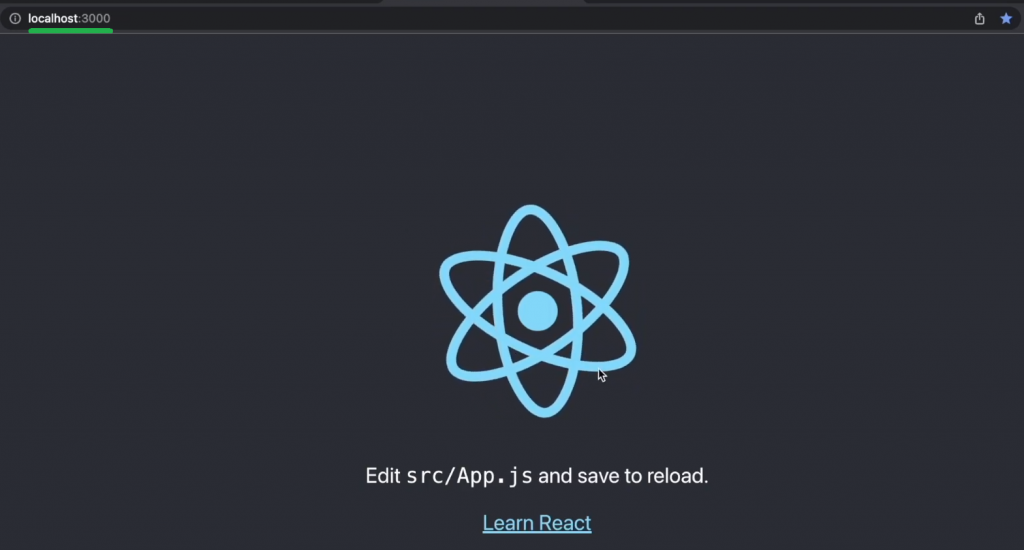
After running the above command, you can view your template React app by visiting “localhost: 3000“:
Moving on, it’s time you tweak the “App.js” script so that it will connect your frontend with the above-created backend. But first, install “axios” using the command below:
npm i axios
Inside the “App.js” file, remove the top “React logo” line, import “axios“, and the entire content inside the “App” div. Then, create the “Fetch Hello” button, which will fetch the data from your backend by triggering the “backendCall” async function. Here’s what your “App.js” script should look like at this stage:
import "./App.css"; import axios from ‘axios’; function App() { async function backendCall(){ const response = await axios.get(“http://localhost:8080/”); console.lo(response.data) } return ( <div className=”App”> <button onClick={backendCall}>Fetch Hello</button> </div> ); } export default App; With the above lines of code in place, run your frontend with the following:
npm start
Then, open “localhost: 3000” in your browser and use your browser’s console to explore what happens when you hit the “Fetch Hello” button:

Step 3: Get Your Moralis Web3 API Key
The first two steps had nothing to do with blockchain app development; after all, you haven’t added any Web3 functionality to your backend yet. However, before we show you how to actually develop blockchain applications by adding such functionality, you need to obtain your Moralis Web3 API key. Fortunately, this is a simple two-step process once you’ve set up your Moralis account. So, in case you haven’t done so yet, use the “create your free Moralis account” link in the intro and enter your credentials. Then, you’ll get to access your admin area and copy your Web3 API key:

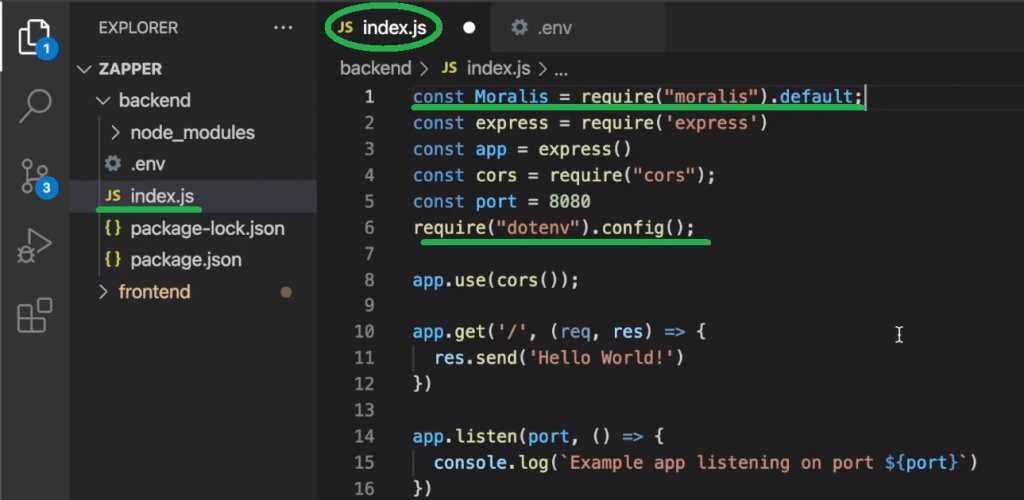
Next, create a “.env” file inside your “backend” folder and paste the above-copied API key as the value for the “MORALIS_API_KEY” variable:

Also, make sure you add the “const Moralis = require(“moralis”).default;” and “require(“dotenv”).config();” lines to your “index.js” file:
Step 4: Implement Moralis EVM API Endpoints
You now have everything ready to start implementing Web3 functionality. This is where the code snippets from the intro will come into play. The best way to copy the EVM API endpoints with surrounding code snippets is by visiting the Moralis API reference pages that await you in the Moralis documentation. Since all endpoints follow similar principles, you only need to look over one example to easily master the rest. So, for example, the following is the “Get native balance by wallet” page:
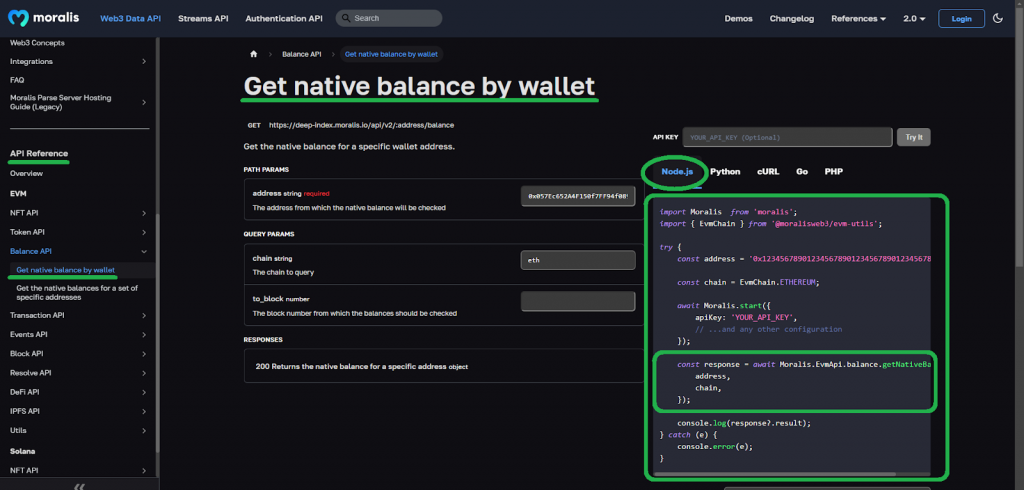
By selecting the NodeJS framework, you can simply copy the required lines of code. So, these are the lines of code you need to add to your backend’s “index.js” script:
app.get("/nativeBalance", async (req, res) => { await Moralis.start({ apiKey: process.env.MORALIS_API_KEY }); try { const { address, chain } = req.query; const response = await Moralis.EvmApi.balance.getNativeBalance({ address: address, chain: chain, }); const nativeBalance = response.data; let nativeCurrency; if (chain === "0x1") { nativeCurrency = "0xC02aaA39b223FE8D0A0e5C4F27eAD9083C756Cc2"; } else if (chain === "0x89") { nativeCurrency = "0x0d500B1d8E8eF31E21C99d1Db9A6444d3ADf1270"; } const nativePrice = await Moralis.EvmApi.token.getTokenPrice({ address: nativeCurrency, //WETH Contract chain: chain, }); nativeBalance.usd = nativePrice.data.usdPrice; res.send(nativeBalance); } catch (e) { res.send(e); } }); Looking at the above lines of code, you can also see the snippets of code that get the native currency’s price using the “getTokenPrice” endpoint and appropriate blockchain addresses. Plus, the above code also includes a simple “if” statement that enables our dapp to choose between two different blockchain networks (chains):

Note: You can access the complete “index.js” script that includes all the Web3 functionality required to create a Zapper-like dapp on GitHub.
Step 5: Add Web3 Features and Styling
With your “index.js” script equipped with the NFT API, Token API, and Balance API endpoints, your backend starts fetching on-chain data. The next step is to tweak your frontend script to obtain that data, just like it did for the “Hello World!” greeting. This is the updated “App.js” script that does the trick:
import "./App.css"; import { useState } from "react"; import NativeTokens from "./components/NativeTokens"; import Tokens from "./components/Tokens"; import TransferHistory from "./components/TransferHistory"; import Nfts from "./components/Nfts"; import WalletInputs from "./components/WalletInputs"; import PortfolioValue from "./components/PortfolioValue"; function App() { const [wallet, setWallet] = useState(""); const [chain, setChain] = useState("0x1"); const [nativeBalance, setNativeBalance] = useState(0); const [nativeValue, setNativeValue] = useState(0); const [tokens, setTokens] = useState([]); const [nfts, setNfts] = useState([]); const [filteredNfts, setFilteredNfts] = useState([]); const [transfers, setTransfers] = useState([]); return ( <div className="App"> <WalletInputs chain={chain} setChain={setChain} wallet={wallet} setWallet={setWallet} /> <NativeTokens wallet={wallet} chain={chain} nativeBalance={nativeBalance} setNativeBalance={setNativeBalance} nativeValue={nativeValue} setNativeValue={setNativeValue} /> <Tokens wallet={wallet} chain={chain} tokens={tokens} setTokens={setTokens} /> <PortfolioValue nativeValue={nativeValue} tokens={tokens} /> <TransferHistory chain={chain} wallet={wallet} transfers={transfers} setTransfers={setTransfers} /> <Nfts wallet={wallet} chain={chain} nfts={nfts} setNfts={setNfts} filteredNfts={filteredNfts} setFilteredNfts={setFilteredNfts} /> </div> ); } export default App; To make the updated script work, you must create several frontend components. If you need guidance on how to create those scripts, watch this article’s video. Also, if you want to create a polished frontend for your Zapper clone, you need proper CSS styling. Thus, make sure to clone all the required scripts from our “ZapperAcademy” repo.
Final Build – Blockchain App Example
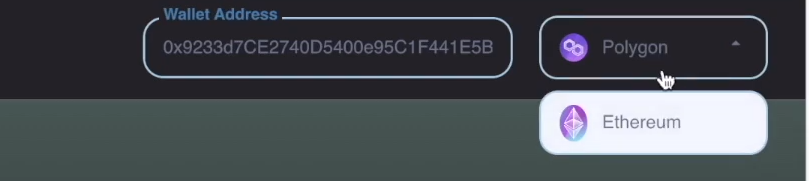
After completing the above blockchain app development tutorial, you’ll be able to take your instance of our example dapp for a spin via “localhost: 3000“. You’ll be able to explore any wallet address by pasting it in the “Wallet Address” field:

You’ll be able to switch between Polygon and Ethereum:
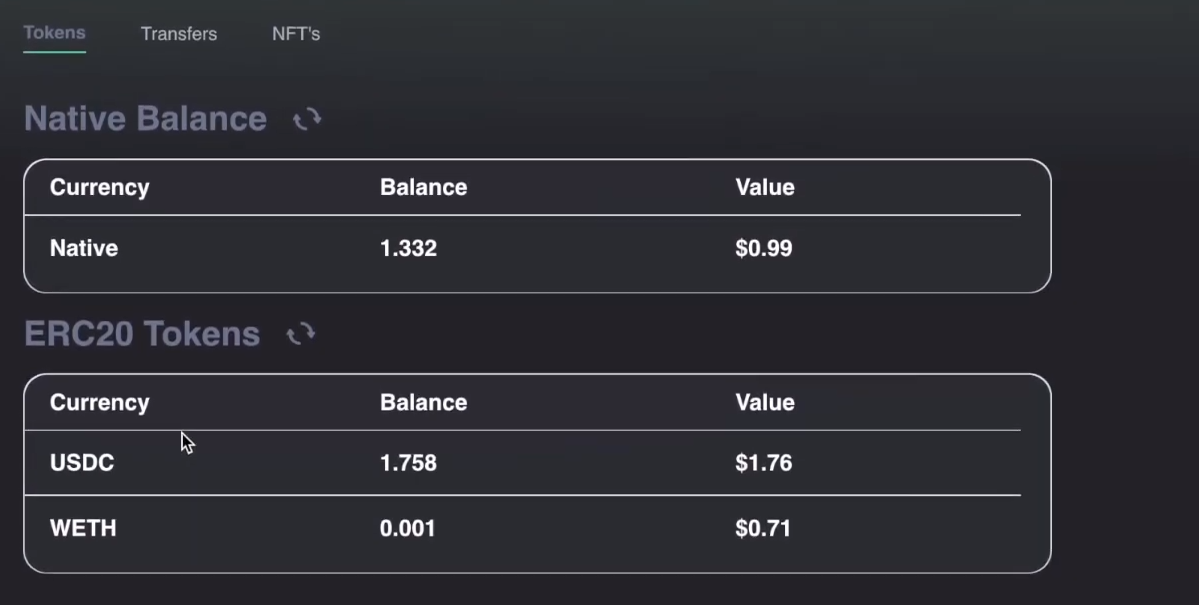
With a wallet address entered, you’ll have a chance to view that wallet’s native, ERC-20, and NFT balances and see the portfolio’s total value:

Here is an example of a wallet’s portfolio and transfers:
- Native and ERC-20 balances via the “Tokens” tab:
- Transfer history via the “Transfers” tab:

- NFT portfolio via the “NFTs” tab:

Exploring Blockchain App Development
If going through the above tutorial made you realize you don’t have the basics under your belt yet, make sure to cover the upcoming sections. This is where you’ll learn what blockchain app development is and how to get started with it.
What is Blockchain App Development?
Blockchain app development is the process of creating decentralized applications (dapps). These are applications that, in some way, utilize on-chain data or interact with one or several blockchain networks. Since dapps come in different forms, the scope of blockchain app development is quite broad. For example, it can range from building a portfolio dapp to creating a Web3 game.
Not long ago, devs needed to run their own RPC nodes and build the entire backend infrastructure from the ground up to create dapps. However, in 2023, the blockchain infrastructure has evolved enough to offer better solutions via several blockchain infrastructure companies. As such, devs can now opt for reliable Web3 providers, making dapp development much simpler. For instance, with a quality Web3 API provider, you can cover all the blockchain-related backend functionalities by simply copy-pasting pre-optimized code snippets. This lets you devote your resources to creating the best possible frontend and providing a user-friendly experience.

How to Get Started Developing Apps for Blockchain?
The best path to build dapps depends on your goals and skills. If you know JavaScript, Python, Go, or any other leading legacy programming language but are new to Web3, Moralis is the tool you need. It will enable you to build all sorts of dapps around existing smart contracts across all the leading blockchain networks. What’s more, you can access the full power of Moralis with a free account.
On the other hand, you may be interested in creating your own smart contracts (on-chain programs). In that case, follow the steps that our in-house expert outlines in the video below:
Since Solidity is the leading option among smart contract programming languages, you’ll most likely decide to target Ethereum and EVM-compatible chains. As such, you’ll also need a reliable wei to gwei converter, Sepolia testnet faucet, and Goerli faucet. With these components, you’ll be able to make the most out of tools such as Hardhat and Brownie.
Even if you are eager to code your own smart contracts, you’ll still want to put them to good use by building user-friendly dapps around them. Therefore, you’ll again want Moralis in your corner to cover your backend needs.
Finally, you shouldn’t forget about the frontend. This is where ReactJS and NextJS can cover all your needs. Of course, CSS skills will also help you get that clean and eye-catching look!
How Do I Become a Blockchain App Developer?
You can become a blockchain app developer for free if you get started with either of the above-outlined paths. The key to becoming a blockchain app developer is obtaining the right tools and enterprise blockchain solutions. Then, you should start practicing right away. For instance, if you know JavaScript (JS), start with a Web3 JS tutorial like the one covered above. However, if Python is the programming language of your choice, Python and Web3 tutorials will be your cup of tea.
When working with smart contracts, importing OpenZeppelin contracts in Remix can save you a lot of time, which can help you create smart contracts with Solidity basics.
As you take on different tutorials and tackle your own ideas, you’ll soon get to a point where you can confidently answer the “what is Web3 technology?” question. You’ll also discover all you need to know about blockchain storage, Notify API alternatives, and how to resolve any ENS domain. In addition, you can speed up the learning process by enrolling in blockchain development courses. This is the right path if you prefer taking a professional approach when it comes to your education. You can find more about the best blockchain app development courses below.
What Language is Best for Blockchain App Development?
The best programming language is usually the one you are already familiar with. However, now that you know how to develop blockchain applications, you can see that JavaScript gives you the most bang for the buck. After all, when using the right tools, such as Moralis, you can cover both frontend and backend aspects with JS. However, if you want to focus on building unique smart contracts on Ethereum and EVM-compatible chains, learn Solidity.
Blockchain App Development Courses
Here’s a list of courses taught by industry experts that can help you learn how to develop blockchain applications:
You can access all of the above courses and more once you enroll in Moralis Academy.

Blockchain App Development – How to Develop Blockchain Applications – Summary
In today’s article, you had a chance to learn how to develop blockchain applications the easy way. You were able to do so through practice by taking on a neat dapp tutorial. Along the way, you learned that JavaScript is arguably the best programming language when it comes to creating blockchain apps. However, other Web2 languages can also get you far. When it comes to smart contract programming, Solidity is the king.
You can also take a professional approach to your blockchain development education by enrolling in Moralis Academy. That said, numerous tutorials and crypto knowledge await you for free in the Moralis docs, on the Moralis YouTube channel, and the Moralis blog. So, dive in and become a blockchain dapp developer in 2023!
Read More: moralis.io


 Bitcoin
  Ethereum
  Tether
  XRP
XRP  BNB
BNB  Solana
  USDC
USDC  Dogecoin
  Cardano
  Wrapped Bitcoin
  Hyperliquid
  Sui
Sui  Wrapped stETH
  Avalanche
  Stellar
  Bitcoin Cash
  Toncoin
  LEO Token
  Shiba Inu
  Hedera
  USDS
USDS  Litecoin
  WETH
WETH  Wrapped eETH
  Polkadot
  Binance Bridged USDT (BNB Smart Chain)
  Ethena USDe
  Pepe
Pepe  Pi Network
  Coinbase Wrapped BTC
  WhiteBIT Coin
  Aave
Aave  Bittensor
  Ethena Staked USDe
  Aptos
Aptos  NEAR Protocol
  OKB
OKB  Jito Staked SOL
  BlackRock USD Institutional Digital Liquidity Fund
  Ondo
Ondo