MetaMask is one of the most well-known names in the Web3 space. The crypto wallet, which surpassed 30 million active monthly users earlier this year, is often the first point of contact many people have with the NFT ecosystem, since for many it serves as a gateway to the Ethereum blockchain, where you can buy and sell digital assets.
Whether you’re transitioning away from an existing software wallet or looking to buy ETH and build an NFT collection for the very first time, this step-by-step guide will walk you through everything you need to know about the MetaMask wallet — including how to set one up.
MetaMask is a free browser extension and mobile app that allows users to interact with the Ethereum blockchain. Just like you use a real-world wallet to store money and buy things, a software wallet lets you buy, sell, and trade digital assets like cryptocurrency and NFTs. MetaMask is one of the most recognizable software wallets out there, and has been around since 2016 — when Consensys, a blockchain software development company, launched it to help increase accessibility in the world of decentralized apps (also called dapps).
How does MetaMask work?
Smart contracts are the heart and soul of blockchain transactions. These are self-executing contracts whose agreement terms are written into lines of code on the blockchain. But to run a blockchain, computers in the system (called nodes) have to manage transactions and share information about those transactions with the rest of the network. Rather than run as a node, which can be costly and difficult to maintain, MetaMask operates by running smart contracts on an existing node called Infura. This enables MetaMask to plug into the network.
MetaMask has several functions, the first being its ability to store crypto. You can use it to buy and sell Ether (ETH), the Ethereum blockchain’s primary crypto token, and also to store any Ethereum-compatible token (like ERC-20, and ERC-721). Another function is trading. Users can enact peer-to-peer token swaps with the wallet without the need for an intermediary. To ensure its users are getting the lowest pricing possible, MetaMask uses info from decentralized exchange aggregators. The wallet also lets you connect to the BNB Smart Chain, access other decentralized apps that use the Ethereum network, and play blockchain-based games.
A note on software and hardware wallets
If you want to set up a crypto wallet, it’s essential to know and consider the differences between software and hardware wallet types. MetaMask, for example, is a software (hot) wallet. Software wallets can be downloaded and installed as either a desktop extension or mobile app and store their digital assets online. One of the benefits of a software wallet like MetaMask is that it’s highly user-friendly and only requires an internet connection and a browser. However, this also means they’re more susceptible to hacks and thus less safe than hardware (cold) wallets.
Hardware wallets are physical devices similar to a USB drive, but they only store crypto assets and nothing else. Because they store digital assets offline, they’re considered far safer than software wallets. Ledger and Trezor are popular hardware wallet choices. Although it’s a software wallet, MetaMask’s desktop extension supports Trezor, Ledger, Lattice, AirGap Vault, and Keystone hardware wallets. This means you can use MetaMask as an interface to request crypto and NFT transactions to the hardware wallet of your choice, which is a safe way to manage your assets. MetaMask’s mobile app currently only supports the Keystone hardware wallet, though the company claims it’s working to add more to that list.
Setting up a crypto wallet for the first time can feel daunting. MetaMask makes the process relatively straightforward, but you’ll still need to follow some steps to ensure you’ve done it correctly.
Step 1: Download and Install MetaMask
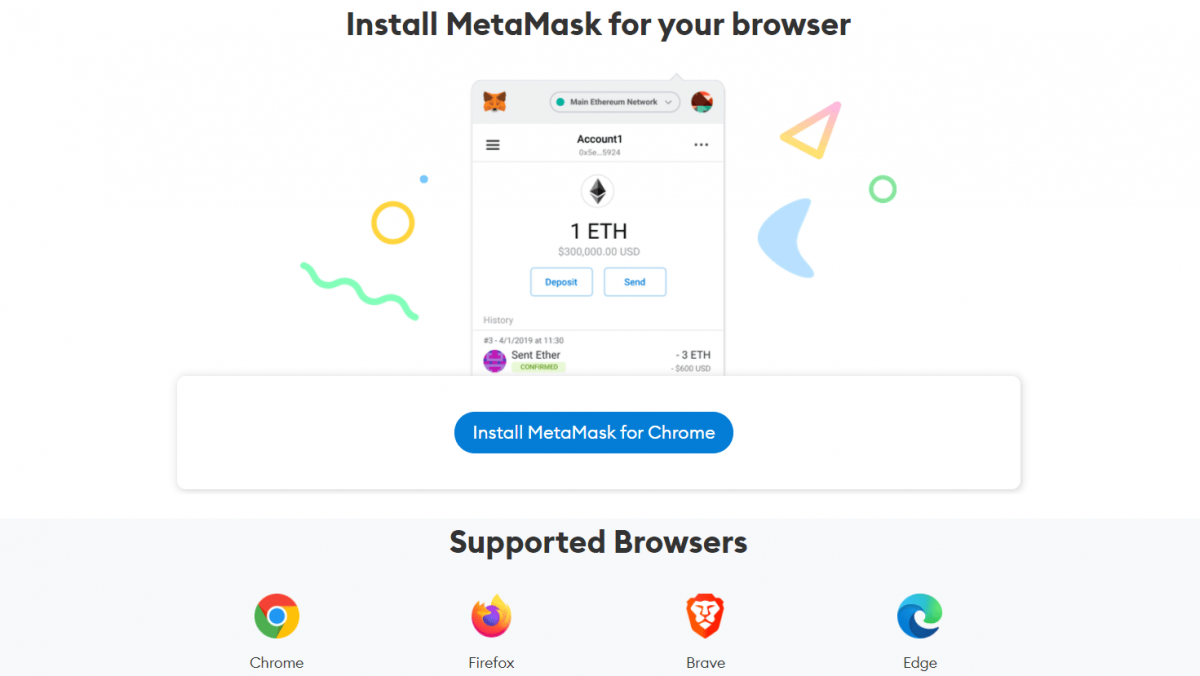
Start at the MetaMask website, where you’ll find instructions on how to download the wallet as well as a list of browsers compatible with the MM browser extension. Currently, MM can be used only on Chrome, Firefox, Brave, Microsoft Edge or as an app via an Apple or Android device.
If you’re hoping to primarily use MM on mobile, the easiest way to get started would still be to set up an account via a PC or Mac. Although you can jump straight into setting up a MM wallet from your phone, browsing and collecting NFTs can be a bit difficult via mobile considering many projects and interfaces aren’t built for a handheld interface. Once you have the browser extension fully set up, you can then create an account that can be imported onto the Apple or Android app.
Step 2: Create an Account
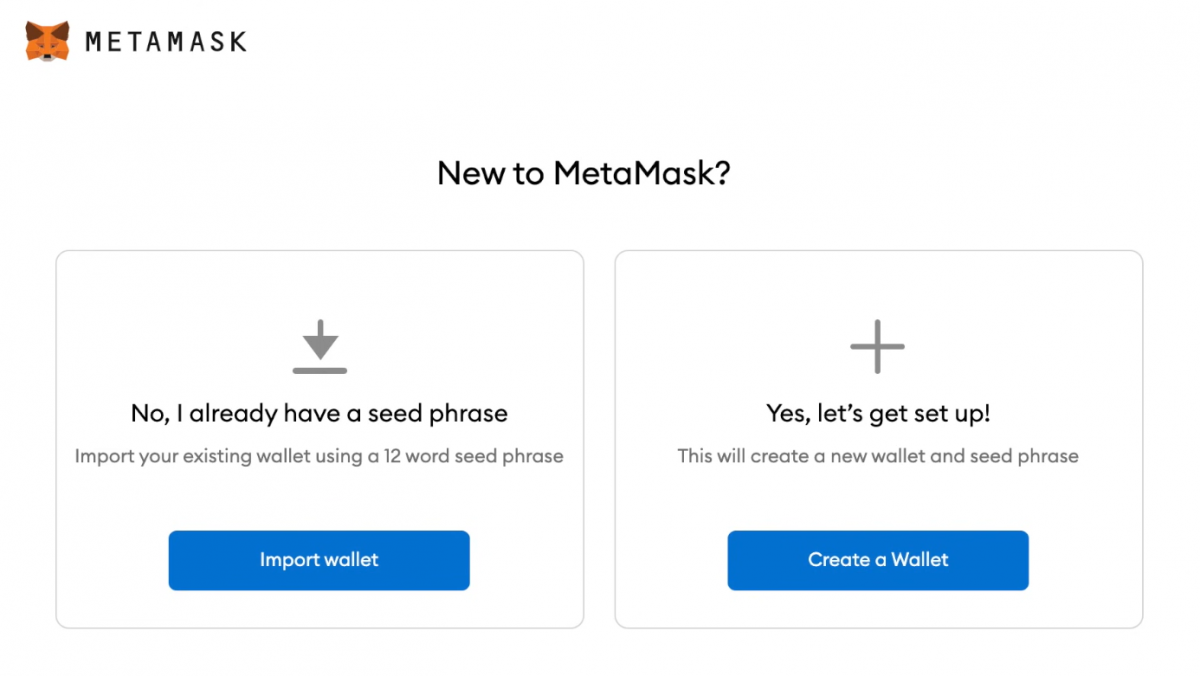
Once you’ve downloaded and installed the browser extension (for this tutorial, we’re using Chrome), you’ll arrive at the first selection screen.
If this is your first time setting up a software wallet, you’ll want to start with the “Create a Wallet” option. If you have an existing software wallet (Atomic, Exodus, Rainbow, etc.) and are wanting to transition over to MetaMask, select the “Import wallet” option.
Create a Wallet
After you’ve selected the option to create a new wallet, you’ll be asked to agree to — or opt-out of — MetaMask’s usage data gathering. You can always opt-out later in the MM wallet settings.
Next, you’ll get a prompt to create a password. You’ll use this password to sign in to your MM account via the browser extension or the mobile app. Although this is not your private key/seed phrase, you’ll want to save it in a safe place, just as with any password.
The next step after selecting a password does involve your seed phrase — or “secret backup phrase” — so act with care. You’ll receive a randomly generated string of words and will be asked to confirm this phrase by entering it back into the app. Once confirmed, you’ll arrive at the main page of your MetaMask wallet.
Note: Two secure ways to consider storing your seed phrase are to physically write it down in a notebook or on a notepad and save it somewhere safe and offline, or use a password manager to encrypt your password and phrase. Saving your phrase anywhere on your computer (Word doc, text file, etc.) could leave you vulnerable to hacks and scams. Since the initial 2021 NFT boom, there have been numerous prominent NFT artists and collectors who have been scammed and hacked via their seed phrase.
Import Wallet
If importing an existing wallet, you’ve most likely navigated a software wallet interface before and have a general idea of how MetaMask will function. Upon selecting the “Import wallet” option, you’ll get a prompt to enter a private key (seed phrase) or upload a JSON file (basically a snapshot of your existing wallet’s info) for the import, so have one or the other ready!
Once you’ve imported your existing wallet, you — as with anyone new to MetaMask — should continue on to Step 3 to ensure your MM wallet is set up to your ideal preferences.
Step 3: Configure Settings
Take a moment to explore and configure your new wallet’s settings. This may seem like an arbitrary step to some, but familiarizing yourself with MetaMask’s settings and assorted menus can be a big help should you ever run into any trouble.
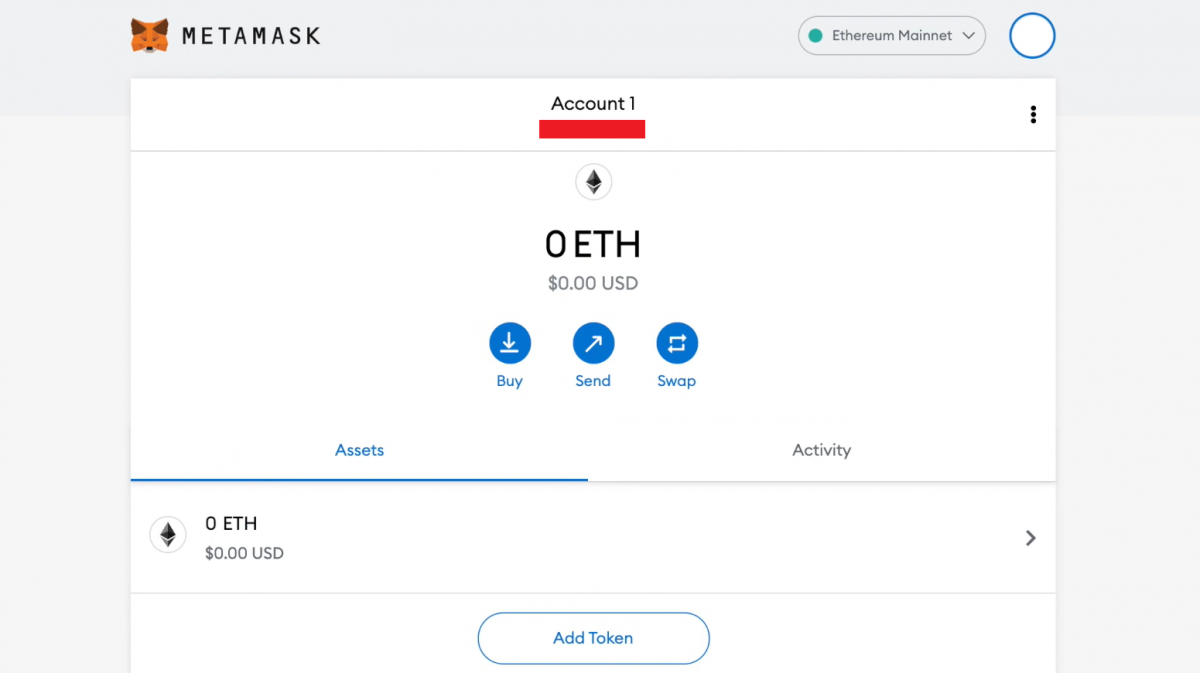
To access the general settings page, click the account photo in the top right of the page next to where it says “Ethereum Mainnet.” Fields such as your account name, notification settings and contact list can be edited from the settings page.
Note that your wallet’s unique Ethereum address is listed directly below the “Account 1” identifier. An Ethereum address is a random string of characters akin to a bank account number. You’ll use this address to interact with the Ethereum blockchain, sometimes inputting it into sites and exchanges to collect, send and receive tokens. Every ETH address is public (more or less, depending on how it’s used) and searchable via Etherscan.io.
Just because you can see/copy someone’s address does not mean you have control over it. While anyone can send a token to any ETH address, only the user who owns the wallet associated with the address (i.e., has the password and seed phrase) can manage and utilize the tokens within it.
After you’ve looked through MetaMask’s settings and verified that your wallet is in the correct language and displaying your preferred currency conversion, you can move on to using your wallet to interact with tokens.
Step 4: Add Funds
The two most common ways to add a token to your MetaMask wallet are by either A) sending it from an exchange (Coinbase, Gemini, etc.), or B) purchasing ETH directly through Wyre, MM’s default payment interface.
Before purchasing or receiving a token in your wallet, be sure to click the “Add Token” button at the bottom of your main wallet page. Although ETH is the default token, as MetaMask is an Ethereum wallet, here you can search for a variety of commonly traded tokens.
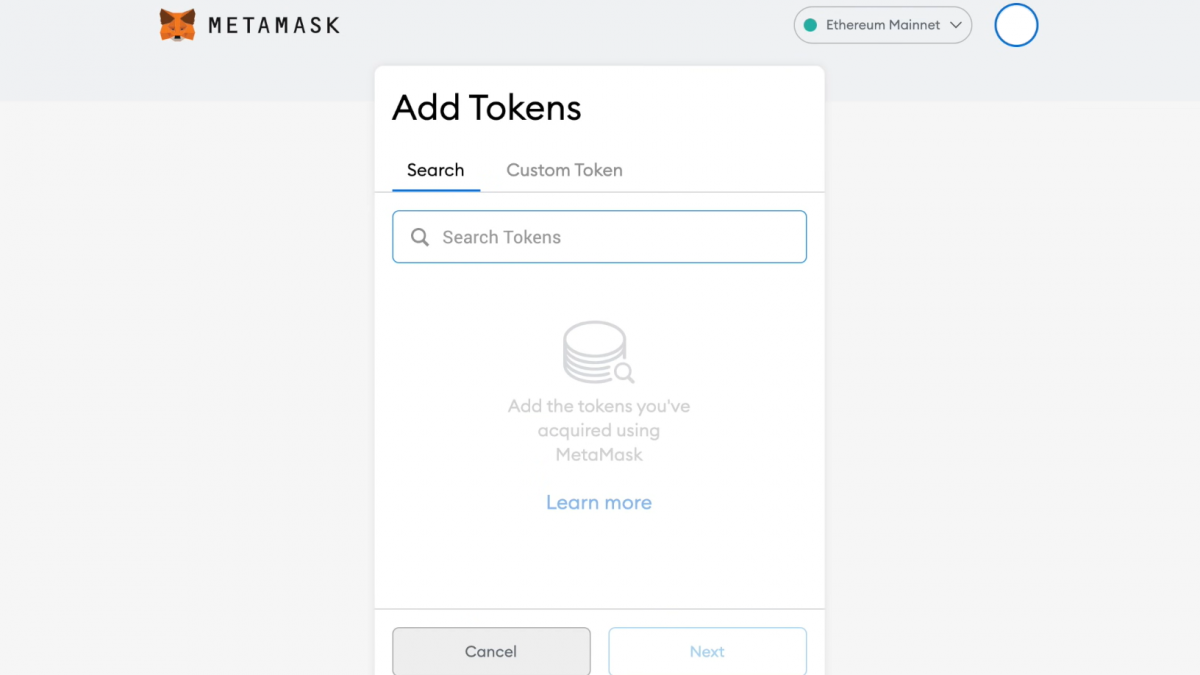
After you’ve added your desired token, it will be easier to import. The coin’s symbol (shorthand identifier: ETH = Ethereum, BTC = Bitcoin, etc.) will appear under “Assets” on the main wallet page just below ETH.
Receiving Tokens From an Exchange
If you’re already an experienced crypto trader, importing from an exchange will be the most direct option for you to transfer tokens into MetaMask. Copy your MetaMask wallet address (that long string of numbers below “Account 1”) before heading over to your preferred exchange and plug that address into the “send” feature.
Similarly, if you’re receiving ETH or another token from a different wallet (be it your own or someone else’s), you’ll need to input your unique Ethereum address into the transaction details on the sender’s wallet.
Purchasing ETH via Wyre
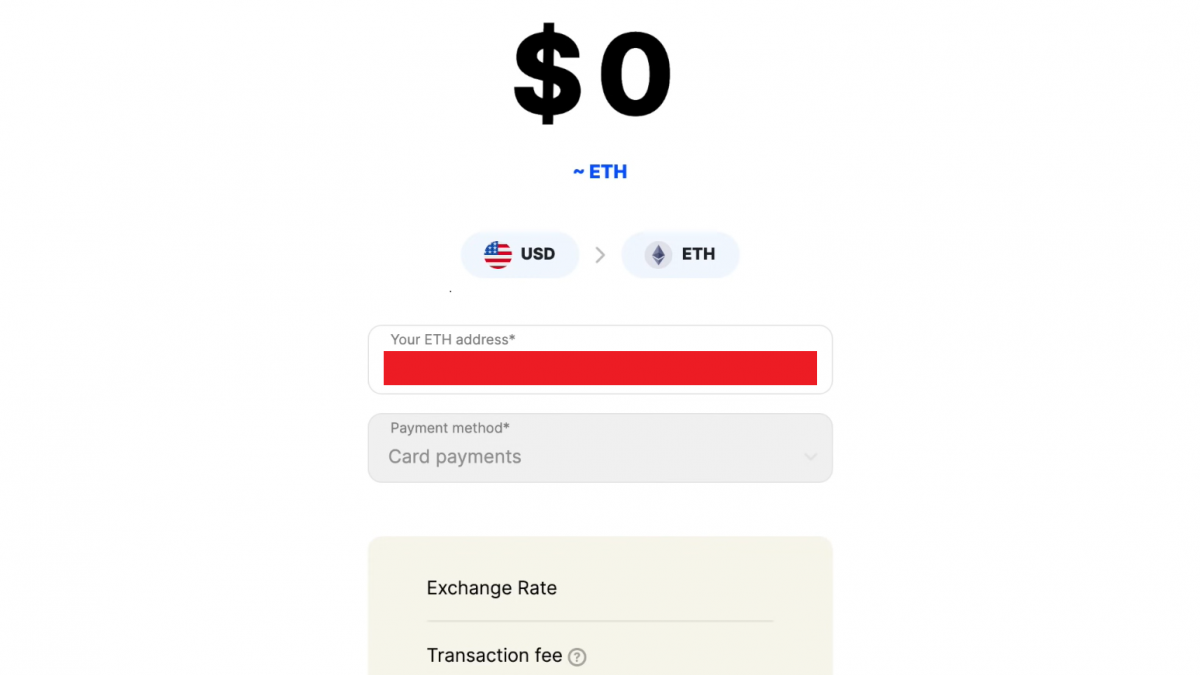
Another way to obtain tokens is to purchase ETH via Wyre. Purchasing ETH through Wyre on MetaMask will allow you to directly receive the funds into your wallet to keep, trade or swap for a different token. This feature can be accessed by simply clicking “Buy” on the main MM wallet page.
Once you’re on the Wyre purchasing interface, there will be a prompt to enter an amount, then billing details. To purchase ETH through Wyre, you’ll need to use a debit card. Credit cards are not accepted.
Note that Wyre’s exchange rate may vary from that of other exchanges (as is common between platforms), and that the company charges a fee to use its services. A detailed calculation of Wyre’s fees can be found on its website.
Step 5: Moving to Mobile
To use your new wallet on your phone, you’ll need to download the MetaMask app through Apple’s App Store or the Google Play Store. Once downloaded, open up the app, which will guide you through a set of prompts similar to when you first set up your wallet.
This time, you’ll want to choose the “Import Using Seed Phrase” option and input the private key you previously saved during your initial MetaMask setup. You’ll then be ready to use your MM wallet on the go.
Step 6: Buying NFTs
Once you’ve set up, explored, and populated your wallet with tokens, you can connect one of the many NFT marketplaces and buy, sell and trade NFTs!
The first marketplace you’ll want to set up an account on is OpenSea. OS is the largest peer-to-peer NFT marketplace out there, and allows users to interact with and trade NFTs from numerous different marketplaces and blockchains.
After you’ve collected some NFTs, they will live inside your wallet and can be found via your OpenSea page (or other marketplace accounts), or under the NFT tab on the MetaMask mobile app. You can learn more about how OpenSea works and how to set up an account on the platform via its support page.
Make sure that you’re signed into your MetaMask before navigating to OpenSea, Rarible, Zora and other NFT marketplaces. Similarly, when prompted to connect your wallet to a website, be it a marketplace or project hub, be sure the site is credible and that the transaction you receive in your wallet was sent by the site you’re currently on and not a third party.
To keep up with Web3 security issues and increase wallet functionality, MetaMask routinely updates its software. In the summer of 2022, the company introduced a key feature to help users better identify fraud attempts by highlighting transactions that request “set approval for all.” This command is often a vital component of a smart contract, granting permission to approve and, crucially, transfer tokens from one user’s wallet to another.
Hackers taking advantage of unsuspecting or careless Web3 denizens have also used this command to transfer the contents of users’ wallets to theirs during phishing attacks or when an NFT marketplace is dealing with bugs. By encouraging users to read the fine print (and making it more legible than fine print), MetaMask hopes the update will raise awareness of Web3 fraud and help prevent people from losing their digital assets to bad actors.
In October 2022, the company also announced it would allow its users to purchase crypto directly through their bank account in MetaMask via Sardine, an Automated Clearing House (ACH) network settlement merchant. The feature lets users buy crypto without waiting days for the transfer to clear (as is often the case when using ACH for bank transfers) and decreases the chances of their purchase being declined, which can happen when buying crypto with credit or debit cards.
Buying NFTs and crypto doesn’t have to be complicated. Web3 tools like MetaMask are designed to make the process relatively straightforward. Now that you’ve got a handle on how to get going with this software wallet, make sure you check out our NFT 101 Guide and our advice on how to keep your digital assets safe by avoiding scams in Web3.
Read More: nftnow.com





 Bitcoin
  Ethereum
  XRP
XRP  Tether
  Solana
  Dogecoin
  USDC
USDC  Cardano
  Lido Staked Ether
  TRON
TRON  Avalanche
  Stellar
  Chainlink
  Sui
Sui  Toncoin
  Hedera
  Wrapped stETH
  Shiba Inu
  Wrapped Bitcoin
  Content Bitcoin
  Polkadot
  WETH
WETH  Litecoin
  Bitcoin Cash
  LEO Token
  Uniswap
  Bitget Token
  Hyperliquid
  Pepe
Pepe  Wrapped eETH
  USDS
USDS  NEAR Protocol
  Ethena USDe
  Aptos
Aptos  Internet Computer
  Aave
Aave  POL (ex-MATIC)
  Ethereum Classic
  Monero
  Cronos
  Algorand
  Render
  Mantle
  MANTRA
  Bittensor
  Virtuals Protocol