When developing decentralized applications (dapps) and other Web3 platforms, you will quickly notice that you need efficient ways of interacting and communicating with various blockchain networks. One way of doing so is setting up blockchain listeners for monitoring relevant smart contract events. However, the million-dollar question is, how do you create blockchain listeners? A prominent option is ethers.js, which is an Ethereum JavaScript library. If you want to learn how to use ethers.js to listen to smart contract events, join us in this tutorial as we show you exactly how to do so!
Before we show you how to use ethers.js to listen to events, let’s return to basics and explore the elements of this library in further detail. From there, we’ll provide a quick introduction to events on Ethereum – which we are using synonymously with “ethers.js events” – giving you a better idea of what we are looking to monitor. Once you have familiarized yourself with ethers.js and Ethereum events, we will show you how to set up a blockchain listener with ethers.js to monitor on-chain events. Lastly, we will top everything off with a comparison between ethers.js and Moralis’ Web3 Streams API!
If you already know how to set up blockchain listeners with ethers.js, you should check out additional Moralis content here on the Web3 blog. For instance, check out the ultimate Web3 py tutorial or learn all you need about the Sepolia testnet! What’s more, before moving further in this article, sign up with Moralis immediately! Creating an account is free, and as a member, you can truly leverage the power of blockchain technology!
What is Ethers.js?
Ethers.js is an Ethereum JavaScript (JS) library released in 2016 by Richard Moore. It is one of today’s most well-used Web3 libraries, featuring millions of downloads. Like traditional libraries, ethers.js also consists of a collection of prewritten snippets of code used to perform common programming tasks. However, a significant difference between conventional libraries and ethers.js is that the latter is blockchain-based. Accordingly, this library makes it easier for developers to interact with the Ethereum network.
The library was initially designed to work with ”ethers.io”; however, since its launch, it has become a more general-purpose library. Moreover, ethers.js features a user-friendly API structure and is written in TypeScript. As a result, it is one of the top choices among emerging Web3 developers, as ethers.js is straightforward and intuitive to use.
Nevertheless, to give you a more profound understanding of the library’s utility, let us briefly list some of the main features of ethers.js:
- ENS – Ethers.js supports Ethereum Name Service (ENS), meaning ENS names are handled as first-class citizens.
- Test Cases – The library features an extensive collection of test cases, which are actively updated and maintained.
- Size – Ethers.js is small, only 284 KB uncompressed and 88 KB compressed.
Furthermore, ethers.js has four core modules: “ethers.utils“, “ethers.wallets“, “ethers.provider“, and “ethers.contract“. These four components are essential for the library’s application programming interface (API). However, if you want to learn more about these, please check out the following guide answering the question, ”what is ethers.js?” in more detail. You might also want to consider checking out additional Web3 libraries. In that case, read our article on Web3.js vs ethers.js!
Events on Ethereum – What are Ethers.js Events?
Smart contracts on the Ethereum blockchain networks generally emit various events whenever something happens within them based on the code. What’s more, these events are a kind of signal emitted from contracts to notify dapps and developers that something of relevance has transpired. Accordingly, developers and platforms can use these signals to communicate.
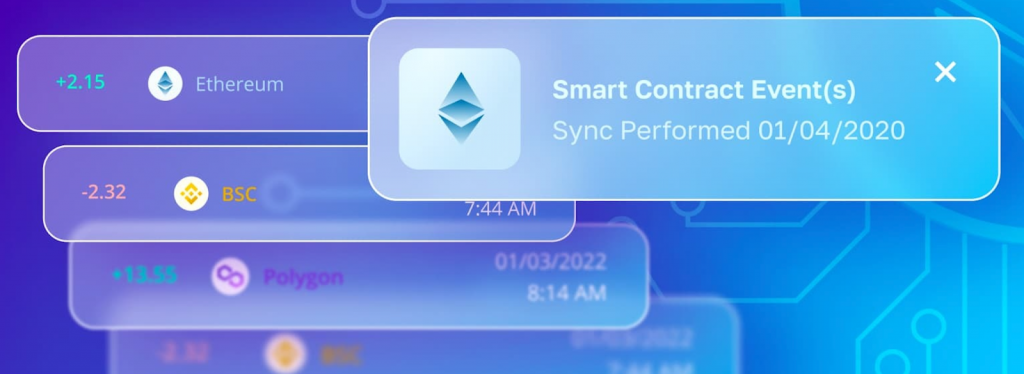
To make this definition more straightforward, let us take a closer look at the ERC-20 token standard as an example. All tokens implementing this smart contract standard autonomously emit a ”transfer” event whenever they are traded, and it is possible to set up blockchain listeners monitoring these events. What’s more, this is only one example, and most smart contracts emit events based on other occurrences alike. Moreover, these are the events that we are additionally calling “ethers.js events”.
So, as you might have figured yourself, it is important to be able to seamlessly listen to these ethers.js events in real time. Further, one way of doing so is through blockchain listeners. However, how do you create one? If you are looking for the answer to this question, join us in the next section, where we will show you how to use ethers.js to listen to blockchain events!
How Can Developers Use Ethers.js Events?
Now that you know what ethers.js events are, the big question is, how do you use them? To adequately answer this question, the following section provides an ethers.js example where we will show you how to create a blockchain listener for monitoring the USD coin (USDC) smart contract. Specifically, you will learn how to monitor the smart contract’s transfer events.
That said – before covering the code for the blockchain listener – you must first set up a NodeJS project. From there, create two new files: ”.env” and ”abi.json”. Moreover, you need to utilize a node provider when using ethers.js to listen to blockchain events. So, in this instance, we will be using Alchemy. Consequently, you must add your Alchemy key as an environment variable to the ”.env” file.
Next, in combination with the provider key, you need to add the USDC contract application binary interface (ABI) to the ”abi.json” file. If you need help finding the ABI of any Ethereum-based contracts, check out Etherscan.
Lastly, to conclude the initial setup process of the NodeJS project, you need to install a few dependencies. As such, open a new terminal and run the following command:
npm i ethers dotenv
How to Set Up an Ethers.js Blockchain Listener
Now that you have set up the NodeJS project, this section focuses on the ethers.js blockchain listener. As such, to proceed, create a new JavaScript file called ”index.js”. Open the file and start by adding the following three lines of code at the top:
const ethers = require("ethers"); const ABI = require("./abi.json"); require("dotenv").config(); The three lines from the code snippet above indicate that ”index.js” uses the ethers.js library, along with importing the contract ABI and the environment variables from ”.env”. From there, the next step is adding an asynchronous function we are going to call ”getTransfers()”:
async function getTransfer(){ const usdcAddress = "0xA0b86991c6218b36c1d19D4a2e9Eb0cE3606eB48"; ///USDC Contract const provider = new ethers.providers.WebSocketProvider( `wss://eth-mainnet.g.alchemy.com/v2/${process.env.ALCHEMY_KEY}` ); const contract = new ethers.Contract(usdcAddress, ABI, provider); contract.on("Transfer", (from, to, value, event)=>{ let transferEvent ={ from: from, to: to, value: value, eventData: event, } console.log(JSON.stringify(transferEvent, null, 4)) }) } This function contains the logic for the ethers.js blockchain listener. Consequently, we will break down the code from top to bottom. Initially, on the first two lines of the ”getTransfers()” function, the code creates two variables: ”usdcAddress” and ”provider”. For the first one, you want to specify the contract address. For the latter, you must determine the node provider using your environment variable key.
Next, the code creates a new ”contract” object by utilizing the ”usdcAddress”, ”ABI”, and ”provider” variables by passing them as arguments for the ”ethers.Contract()” function. From there, the code sets the listener using the ”contract” object, specifying ”Transfer” events as the topic of interest. Finally, the code console logs the results!
Nevertheless, the complete code of the ”index.js” file should now look something like this:
const ethers = require("ethers"); const ABI = require("./abi.json"); require("dotenv").config(); async function getTransfer(){ const usdcAddress = "0xA0b86991c6218b36c1d19D4a2e9Eb0cE3606eB48"; ///USDC Contract const provider = new ethers.providers.WebSocketProvider( `wss://eth-mainnet.g.alchemy.com/v2/${process.env.ALCHEMY_KEY}` ); const contract = new ethers.Contract(usdcAddress, ABI, provider); contract.on("Transfer", (from, to, value, event)=>{ let transferEvent ={ from: from, to: to, value: value, eventData: event, } console.log(JSON.stringify(transferEvent, null, 4)) }) } getTransfer() How to Run the Script
With all the code added to the ”index.js” file, all that remains is running the script. To do so, open a new terminal and run the following command:
node index.js
Once you execute the command above, the code will return USDC transactions data in your console, and it will look something like this:
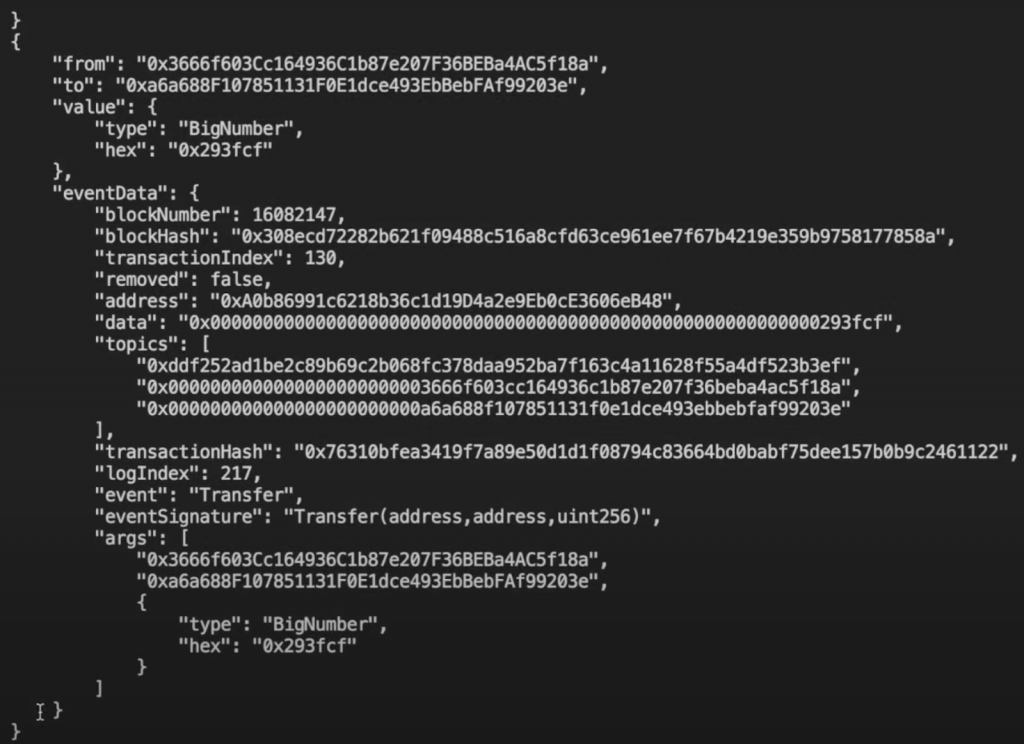
Running the script returns an abundance of information, including the to and from addresses, event data, and much more. Unfortunately, the response above does not contain parsed data, and we cannot, for instance, determine the origin of the information. In conclusion, using ethers.js for listening to blockchain events is a great start, but it leaves more to be desired. So, are there any ethers.js alternatives?
Is There an Alternative to Ethers.js Events?
Even though ethers.js is a good option for setting up blockchain listeners for monitoring smart contract events, it is not perfect. Consequently, it is worth considering other alternatives as well. For instance, one of the most prominent examples is Moralis’ Streams API!
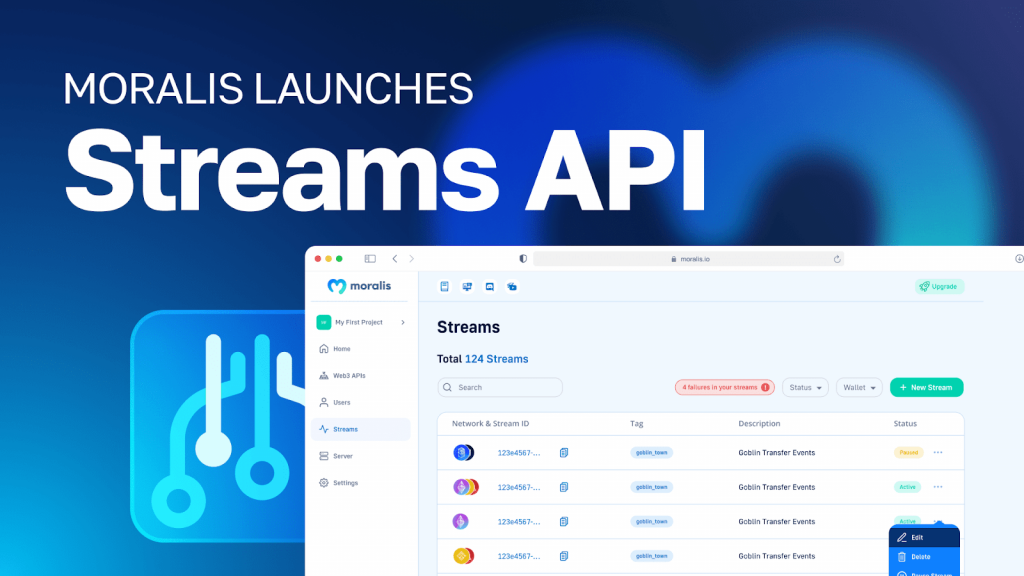
With the Streams API, you can effortlessly stream on-chain data into the backend of your blockchain projects via Web3 webhooks. Through this Moralis feature, you can set up streams to receive Moralis webhooks whenever an address receives, swaps, or stakes an asset, a battle starts in your blockchain game, or any other smart contract events trigger based on your filters!
What’s more, through the accessibility of Moralis, you can set up your own streams in five straightforward steps:
- Provide a smart contract address
- Apply filters specifying when to receive webhooks
- Select the chain(s) you want to monitor
- Add your webhook URL
- Receive webhooks
Nevertheless, let us explore how Moralis’ Web3 Streams API is better than ethers.js!
How the Web3 Streams API is Better Than Ethers.js
Ethers.js is a good alternative for setting blockchain listeners to monitor smart contract events. However, if you start working with this library, you will quickly notice its limitations. As such, it is worth considering other options like Moralis’ Streams API instead. To give you a better idea of why this is, we have summarized the similarities and differences between ethers.js and Moralis down below:
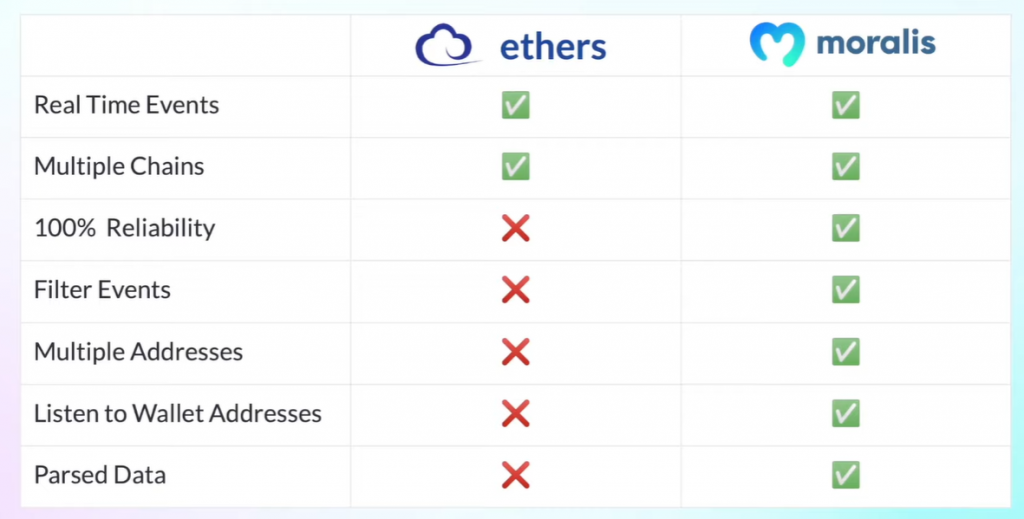
With this quick overview, you can instantly see that Moralis provides everything ether.js does and more when setting up blockchain listeners. However, just looking at the points made in the table above can be somewhat cryptic. Therefore, let us examine and break down the table for you in the following sub-section to provide an in-depth analysis of the differences between ethers.js and the option where users can set up Web3 streams using the Streams API!
Ethers.js vs Web3 Streams
The table above shows that both ethers.js and Moralis streams allow you to monitor real-time events. Both options support multiple chains, meaning you can monitor events for different blockchain networks. However, while that covers the similarities, how do these two options differ?

First, Moralis offers 100% reliability. But what does this mean? As you might remember from the ”How Can Developers Use Ethers.js Events?” section, you need to provide a separate node provider when using ethers.js. This can be problematic, as it is difficult to know if the nodes maintained by the provider will stay operational indefinitely. However, this is not the case with Moralis, as you have a single tech stack and always receive real-time alerts through webhooks instead.
You can additionally filter events with Moralis’ Web3 Streams API. Consequently, you can target events and only receive webhooks for the on-chain data you require. You can also pool contracts into a single stream, which is impossible when using ethers.js. With ethers.js, you would instead need to set up separate blockchain listeners for new contracts.
Finally, you can listen to wallet addresses when using Moralis. This means you can receive webhooks whenever a wallet performs a particular action. Moreover, in combination with the aforementioned benefits, the data received from Moralis webhooks is parsed. As such, you do not need to worry about additional formatting and processing. This further means that the data is ready to use ”straight out of the box” in your Web3 projects.
Nevertheless, check out our article on ethers.js vs Web3 streams for more information about the differences. You might also want to watch the video down below, showing you how to set up blockchain listeners using both ethers.js and Moralis’ Web3 Streams API:
Ethers.js Events – Summary
If you have followed along this far, you now know how to listen to smart contract events with ethers.js. In this tutorial, we taught you how to create a blockchain listener for monitoring the transfer event of the USDC smart contract. In doing so, the article showed you how to set up a NodeJS project, add the code for the blockchain listener, and run the script. You can now use the same fundamental principles to monitor any smart contract events using ethers.js for your future blockchain projects!
If you found this ethers.js example tutorial helpful, consider checking out more Moralis content. For instance, read our article on how to get all transfers of an NFT. In that guide, you get to explore the accessibility of Moralis’ NFT API, which is one of the many Web3 APIs offered by Moralis. Other prominent examples are the Token API, Solana API, EVM API, etc. Thanks to these tools, Moralis presents the fastest way to build a Web3 app!
Consequently, no matter what Web3 development endeavors you embark on, sign up with Moralis, as this is how you can fully leverage the power of blockchain technology!
Read More: moralis.io


 Bitcoin
  Ethereum
  XRP
XRP  Tether
  Solana
  USDC
USDC  Dogecoin
  Cardano
  Lido Staked Ether
  TRON
TRON  Wrapped Bitcoin
  Chainlink
  Wrapped stETH
  Stellar
  Litecoin
  Avalanche
  Sui
Sui  UGOLD Inc.
  Toncoin
  LEO Token
  USDS
USDS  Shiba Inu
  Hedera
  Hyperliquid
  WETH
WETH  MANTRA
  Polkadot
  Bitcoin Cash
  Ethena USDe
  Uniswap
  Bitget Token
  Wrapped eETH
  Monero
  WhiteBIT Coin
  Pepe
Pepe  Aave
Aave  Ondo
Ondo  NEAR Protocol
  Mantle
  sUSDS
sUSDS  Dai
Dai  Aptos
Aptos  Official Trump
  Bittensor
  Internet Computer
  Ethereum Classic
  OKB
OKB  Gate
Gate  Tokenize Xchange